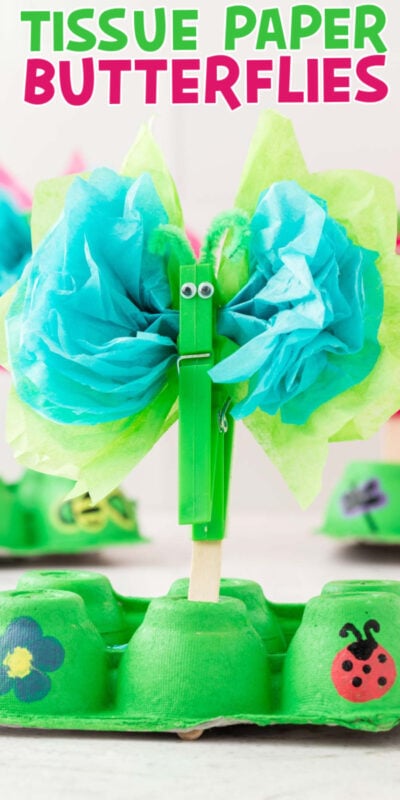
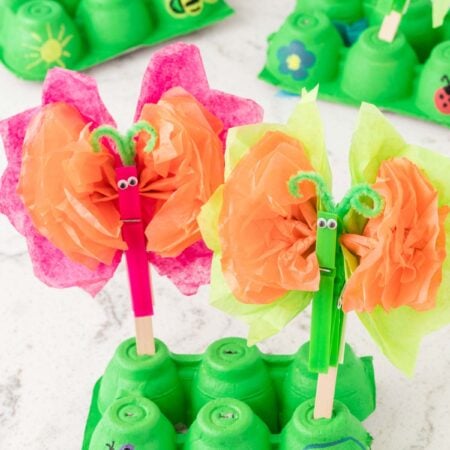
As my youngest son gets older, he’s getting way more into arts and crafts. Last week he was on on a coloring kick (thank goodness I have all sorts of coloring pages for him to choose from). And this week he’s on a painting kick, so I thought it would be fun to let him paint leftover egg cartons I had after making breakfast muffins this week. This little garden craft is super fun because kids can paint their egg carton gardens and then can also make the tissue paper butterflies to stick into the garden – making it like a real little garden! Plus, kids can decorate their gardens however they want with markers, paint markers, or even stickers if you want to go that route! My son loved doing this craft, and I hope your kids will! This would also make a simple craft for a kid’s art class, camp, or really anytime you’re just feeling creative! Pair it with this nature scavenger hunt for some real nature themed fun!
Why You’ll Love This Craft
Low mess – unlike a lot of crafts that include things like glitter, the only real mess here is the painting part, which can be contained pretty easily!Kid-friendly – while there are parts of this craft that need adult supervision (like stapling), most of this can be done by kids on their own!Creativity shines – these tissue paper butterflies let you use all sorts of different colors, textures, and designs to make your butterflies look however you want them to! It’s a great way to let kids let their unique personalities and favorites come through.
Supplies
Supply Notes
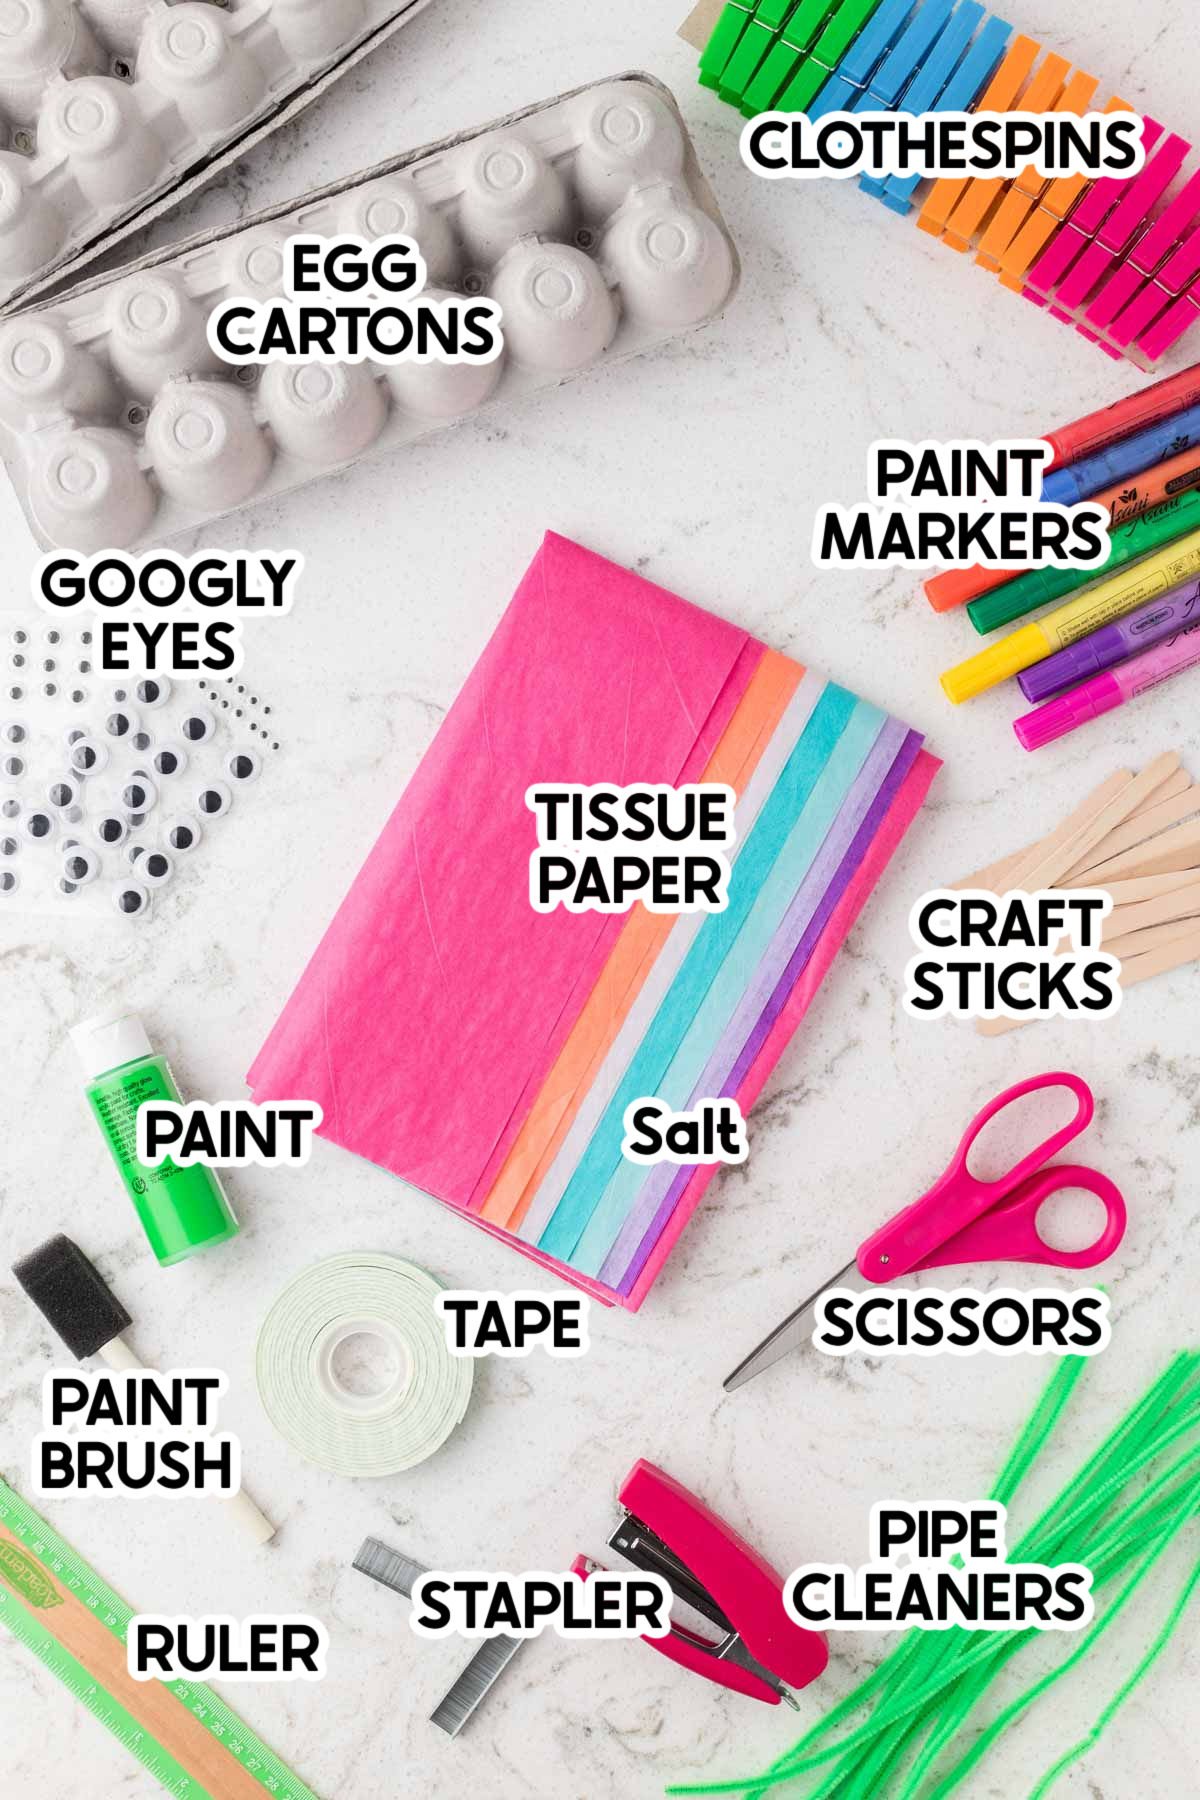
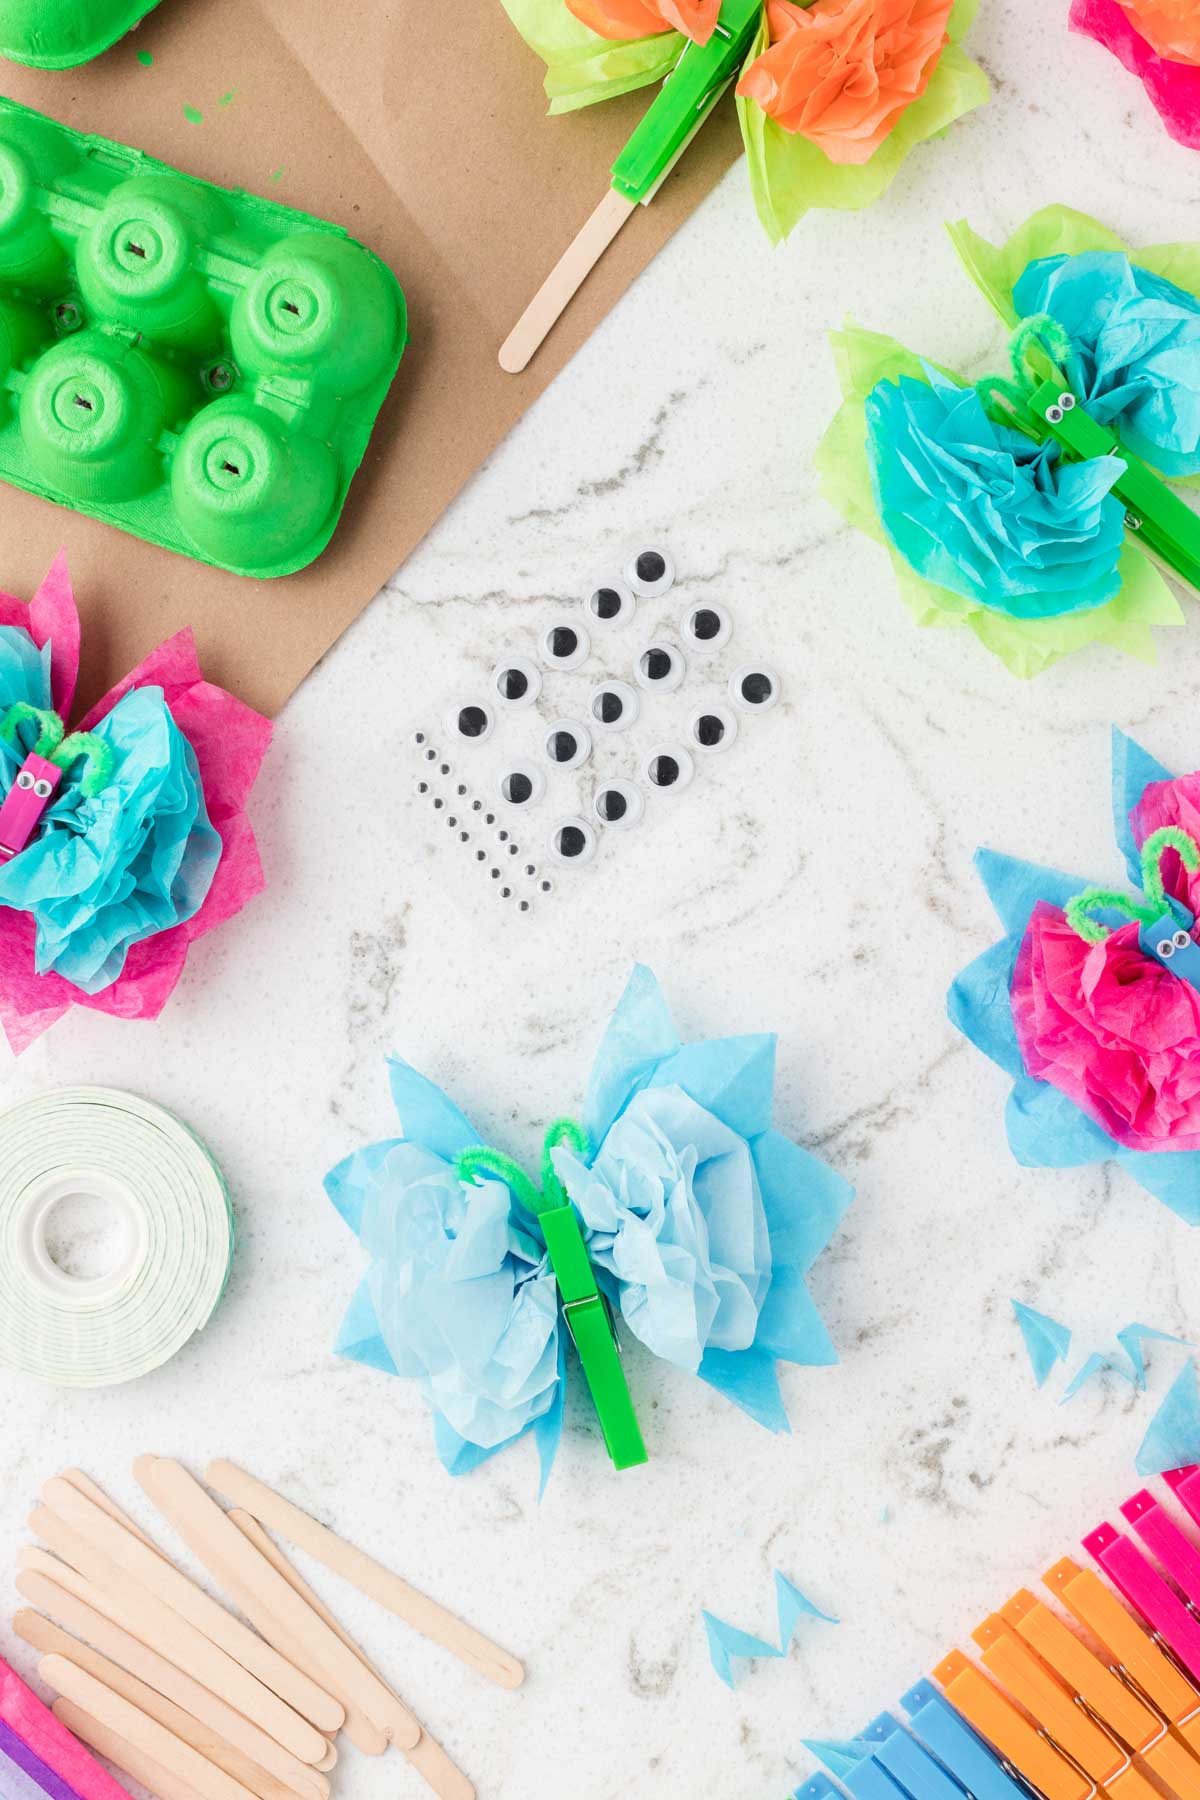
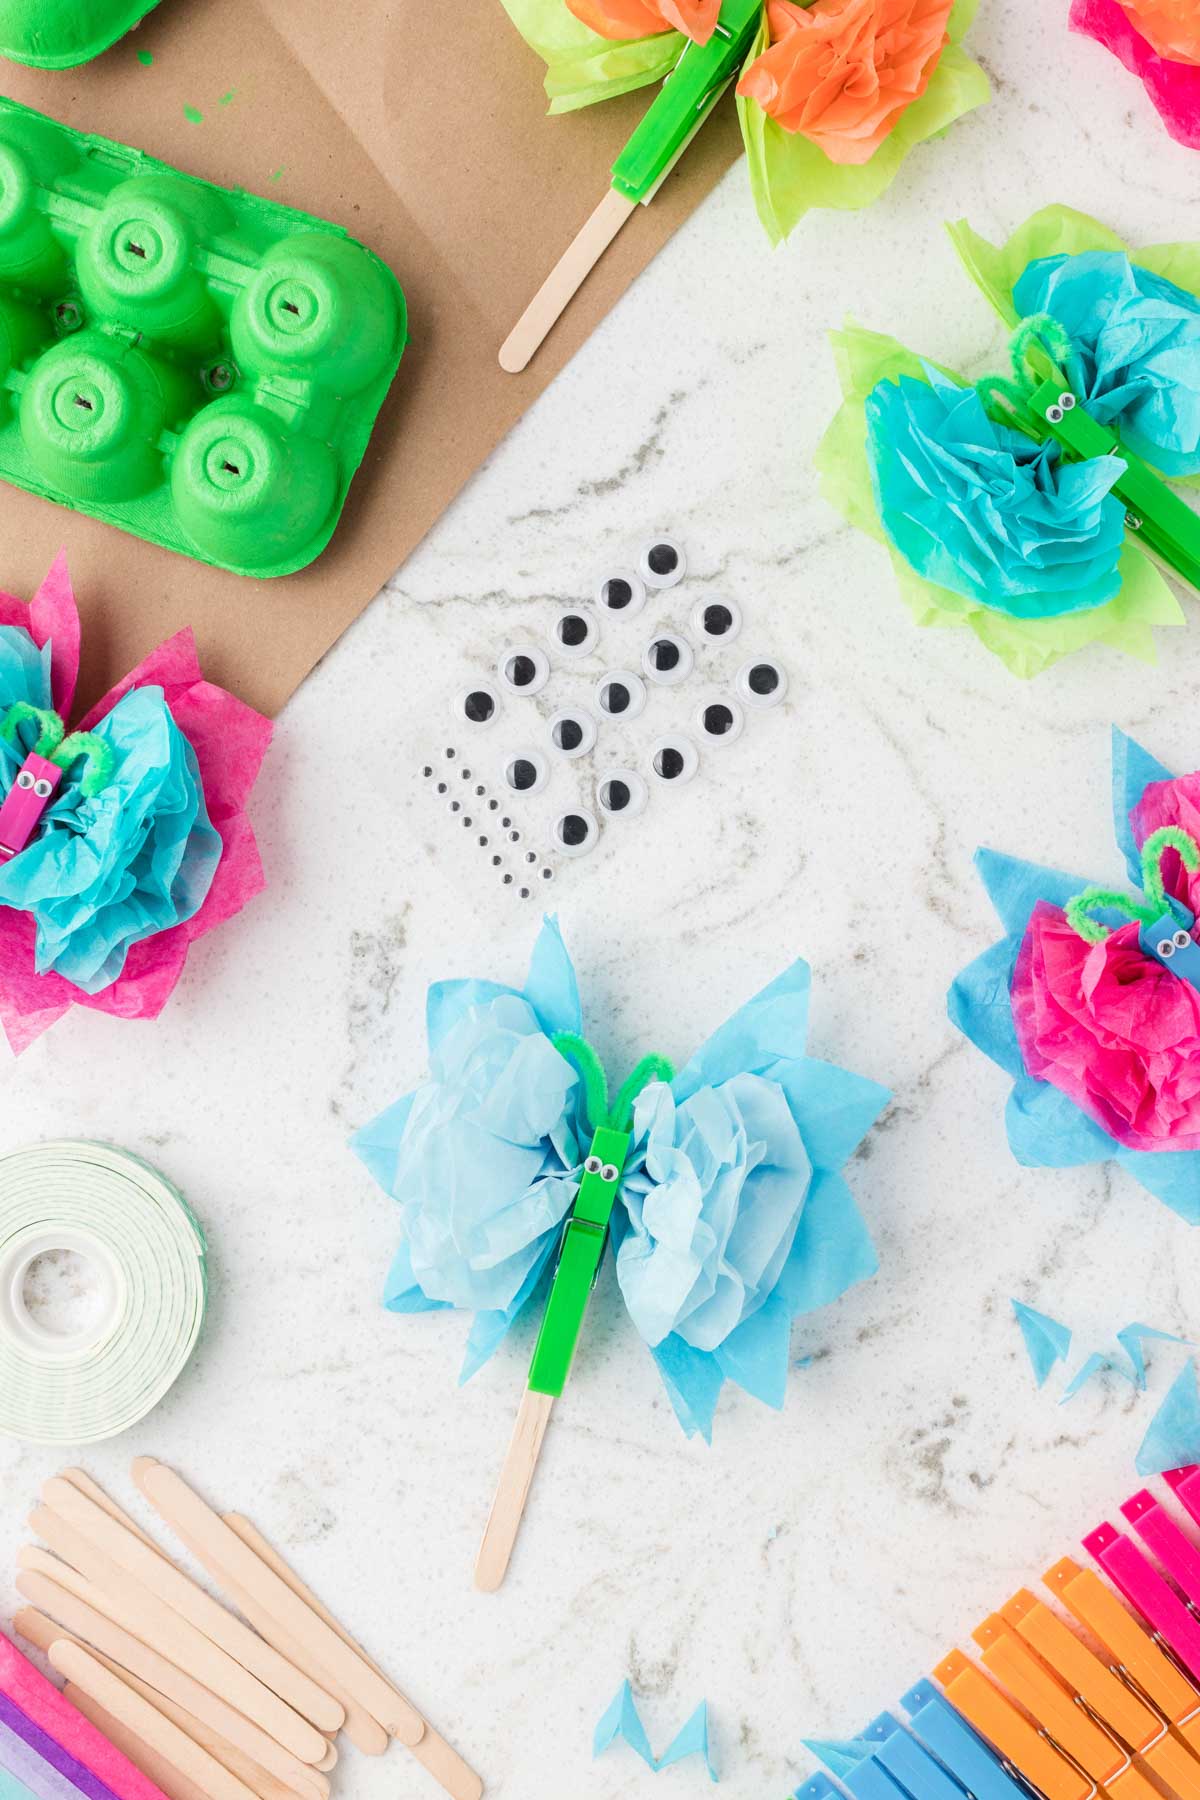
Clothespins – any clothespins work, I just liked the bright colors of these ones. If you can’t find colorful ones, you can always paint regular ones as well. Tape – I like to use this double-sided craft tape because it helps sticks things together more securely than typical Scotch tape does. You could also use craft glue, but I find it to be messy and take a long time to stick, so my preference is the tape. Egg cartons – you’ll need one half of an empty egg carton for each of the gardens. I just cut them apart with scissors but you could also use a box cutter. Craft sticks – I recommend the thinner ones like these popsicle sticks compared to the thicker ones (that look like tongue depressors). Paint – I recommend craft paint for these because it dries fast, but it is harder to get out of things like clothes, so if you do go with the craft paint like I did, I recommend putting kids in painting smocks or clothes they don’t mind getting paint on. Paint brush – I used a foam paint brush because they’re cheap but any paint brush will really work for this. Googly eyes – you can really do any size that will fit onto a clothespin, but I highly recommend getting the self-adhesive ones so you aren’t dealing with glue or tape with the little eyes. Tissue paper – you can use any color and size you want – I recommend bright colors! Use any leftover tissue paper to make a DIY advent calendar or punch game!
How to make tissue paper butterflies
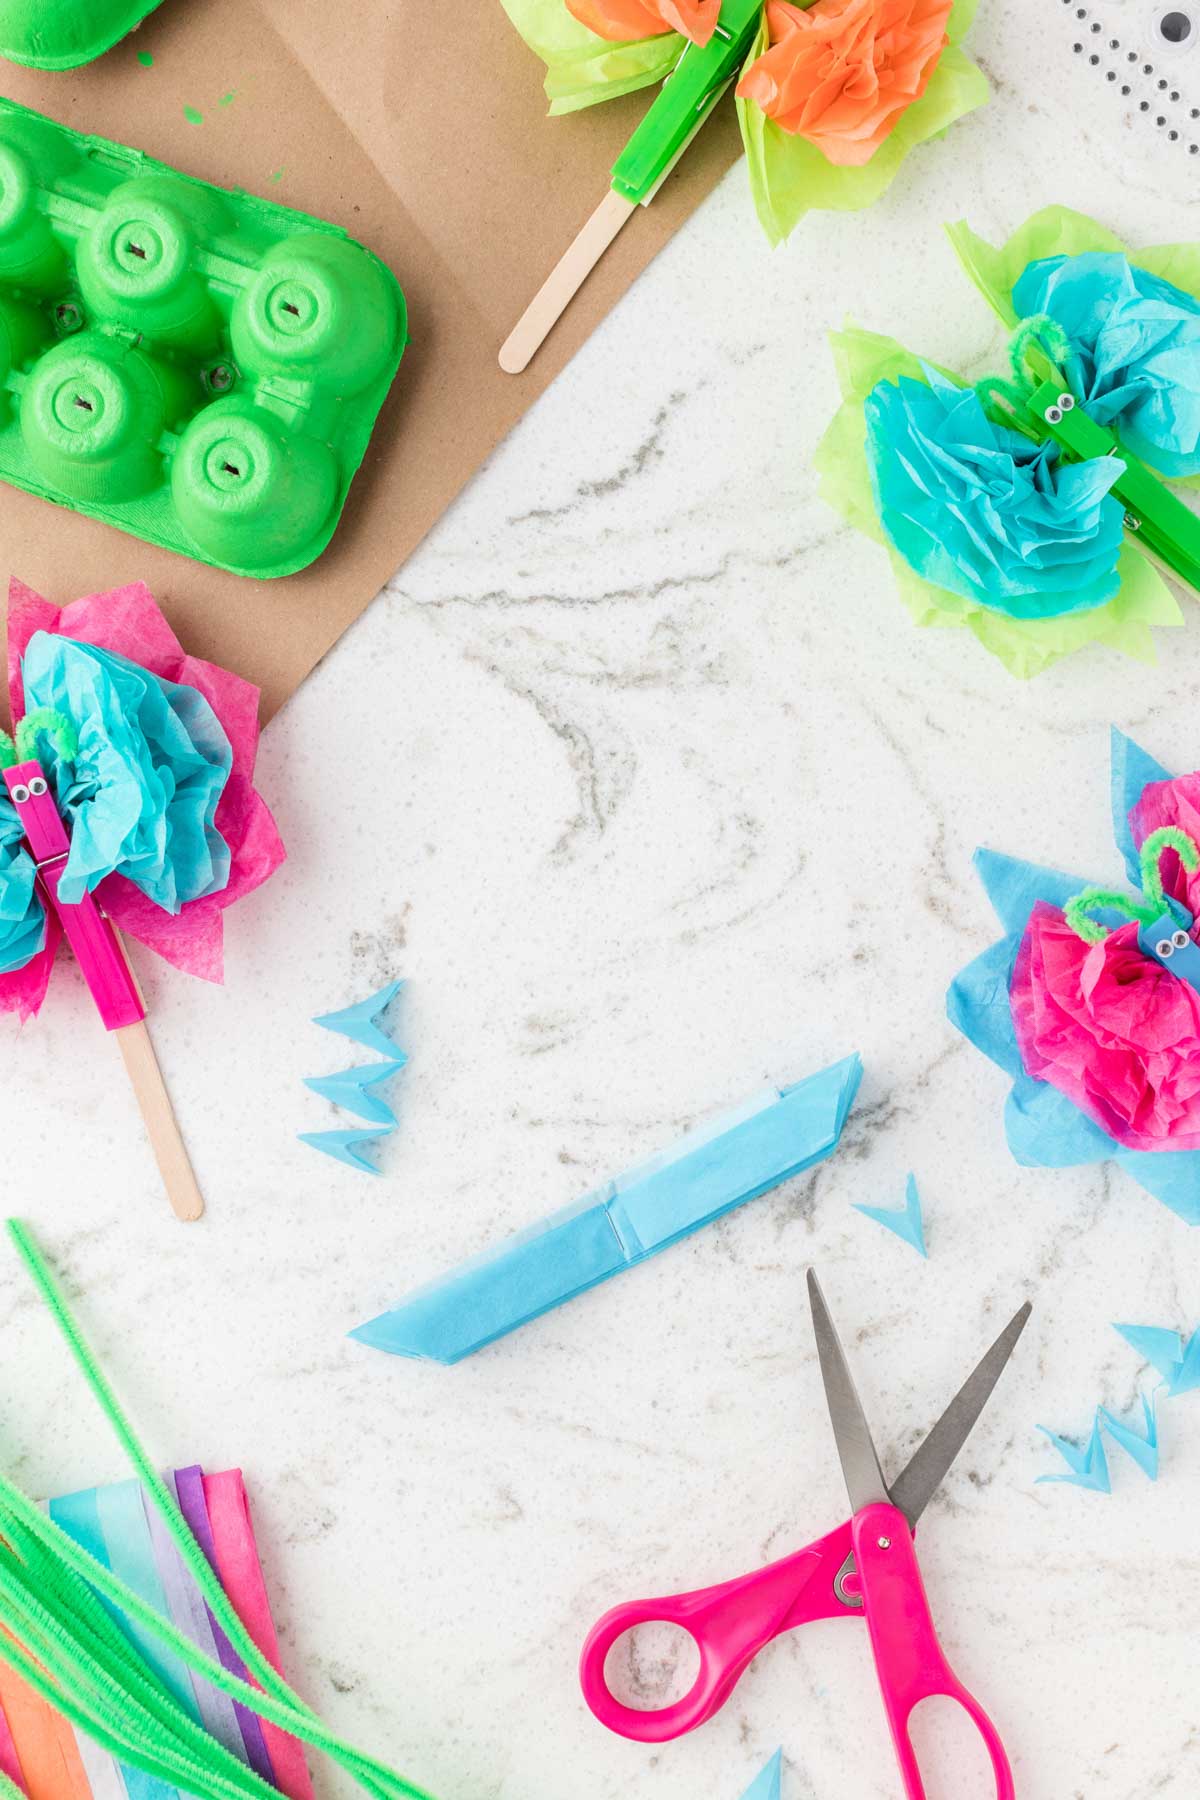
These are pretty easy to make but in case you can’t follow with just the pictures, I’m going to walk through how to make these step by step, starting with getting your egg cartons ready to paint!
1 – Prep the Egg Cartons
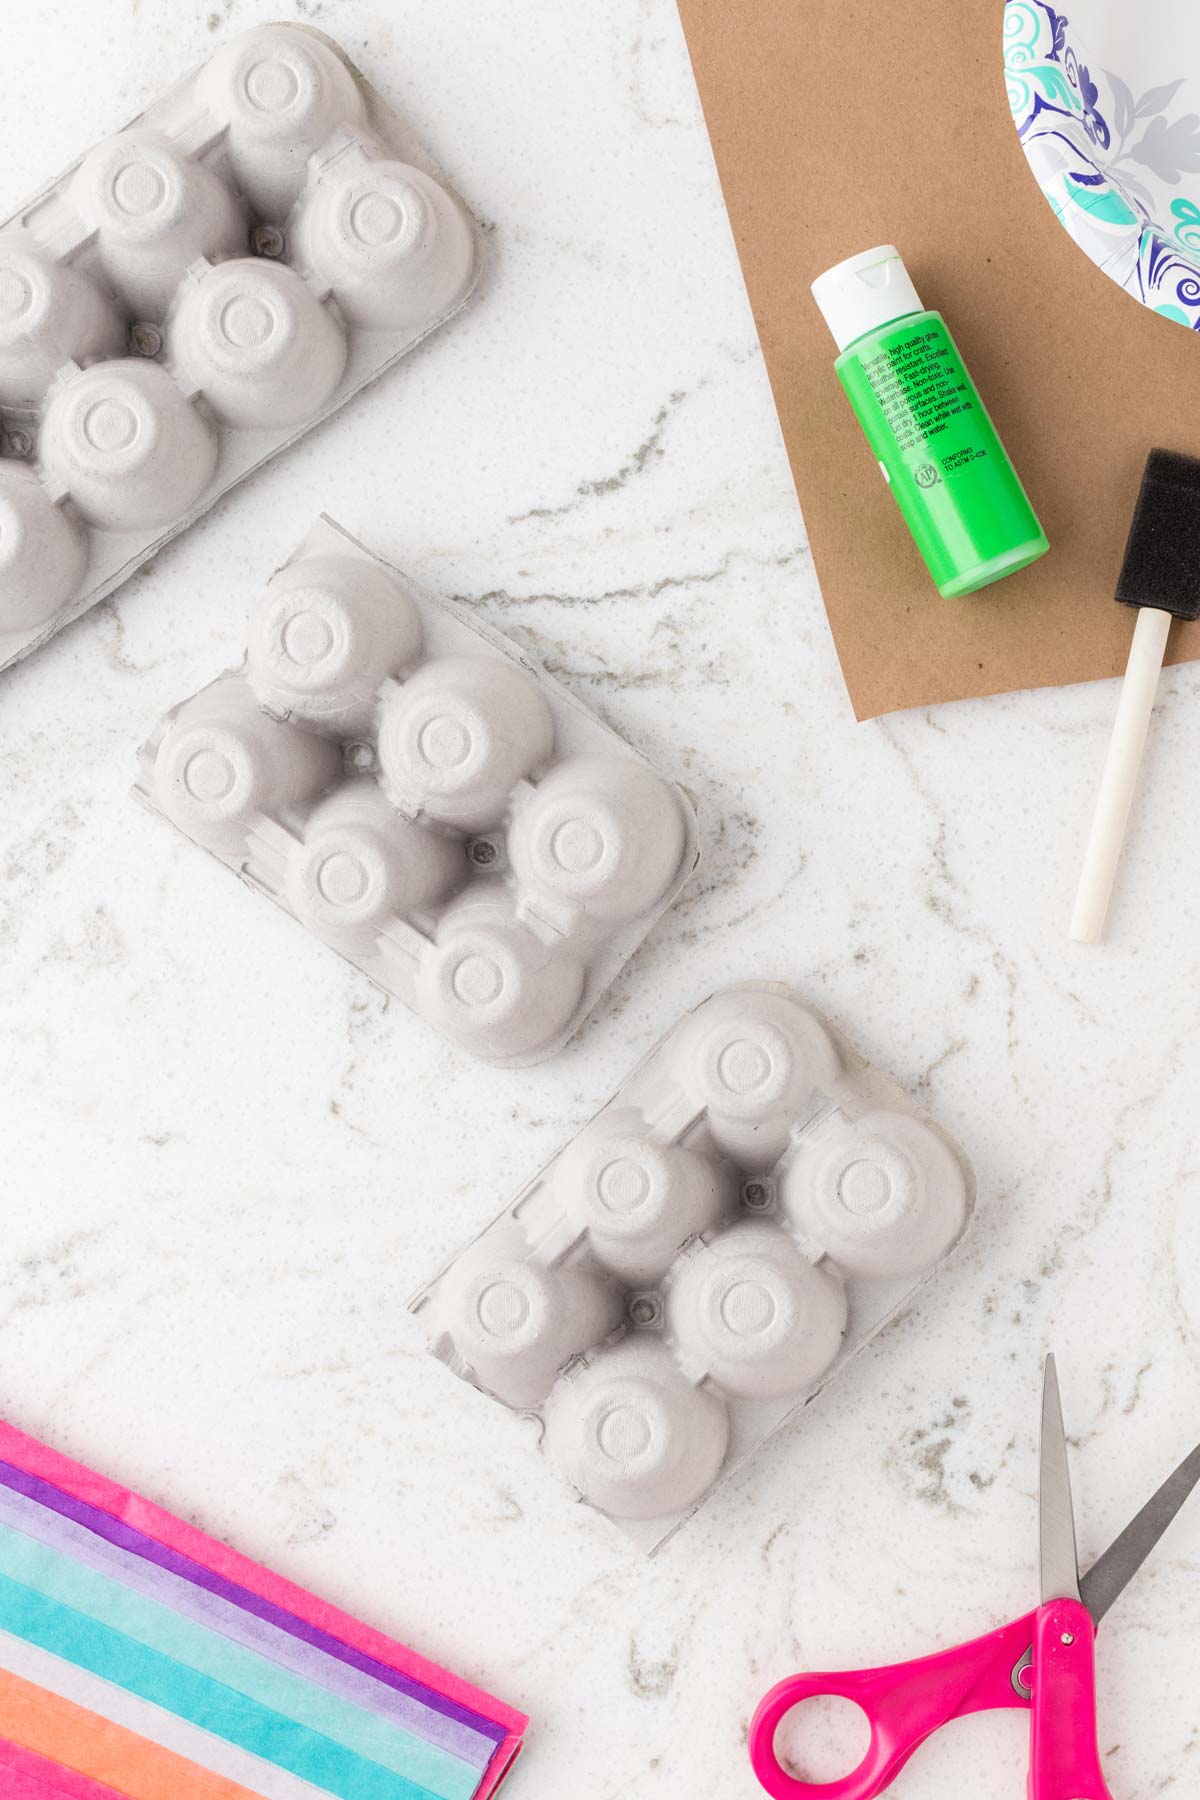
Cover a table with newspaper or a plastic table covering then add some paint into paint trays or paper plates. Cut the top and the lip of the egg carton off, then cut each one in half. This will be the base of your garden. Once that’s done, cut a small 1/4 inch slit in the center of the bottom of each of the cups – this is where you’ll stick your butterflies when they’re done!
2 – Paint the Egg Cartons
Next, flip the cartons back over and paint the cartons green with the paint. Then set aside and let them dry for at least 10 minutes (craft paint dries fast!). While your cartons are drying, you can move onto making the butterflies so you’re not just sitting around waiting for paint to dry!
3 – Make the tissue paper butterflies
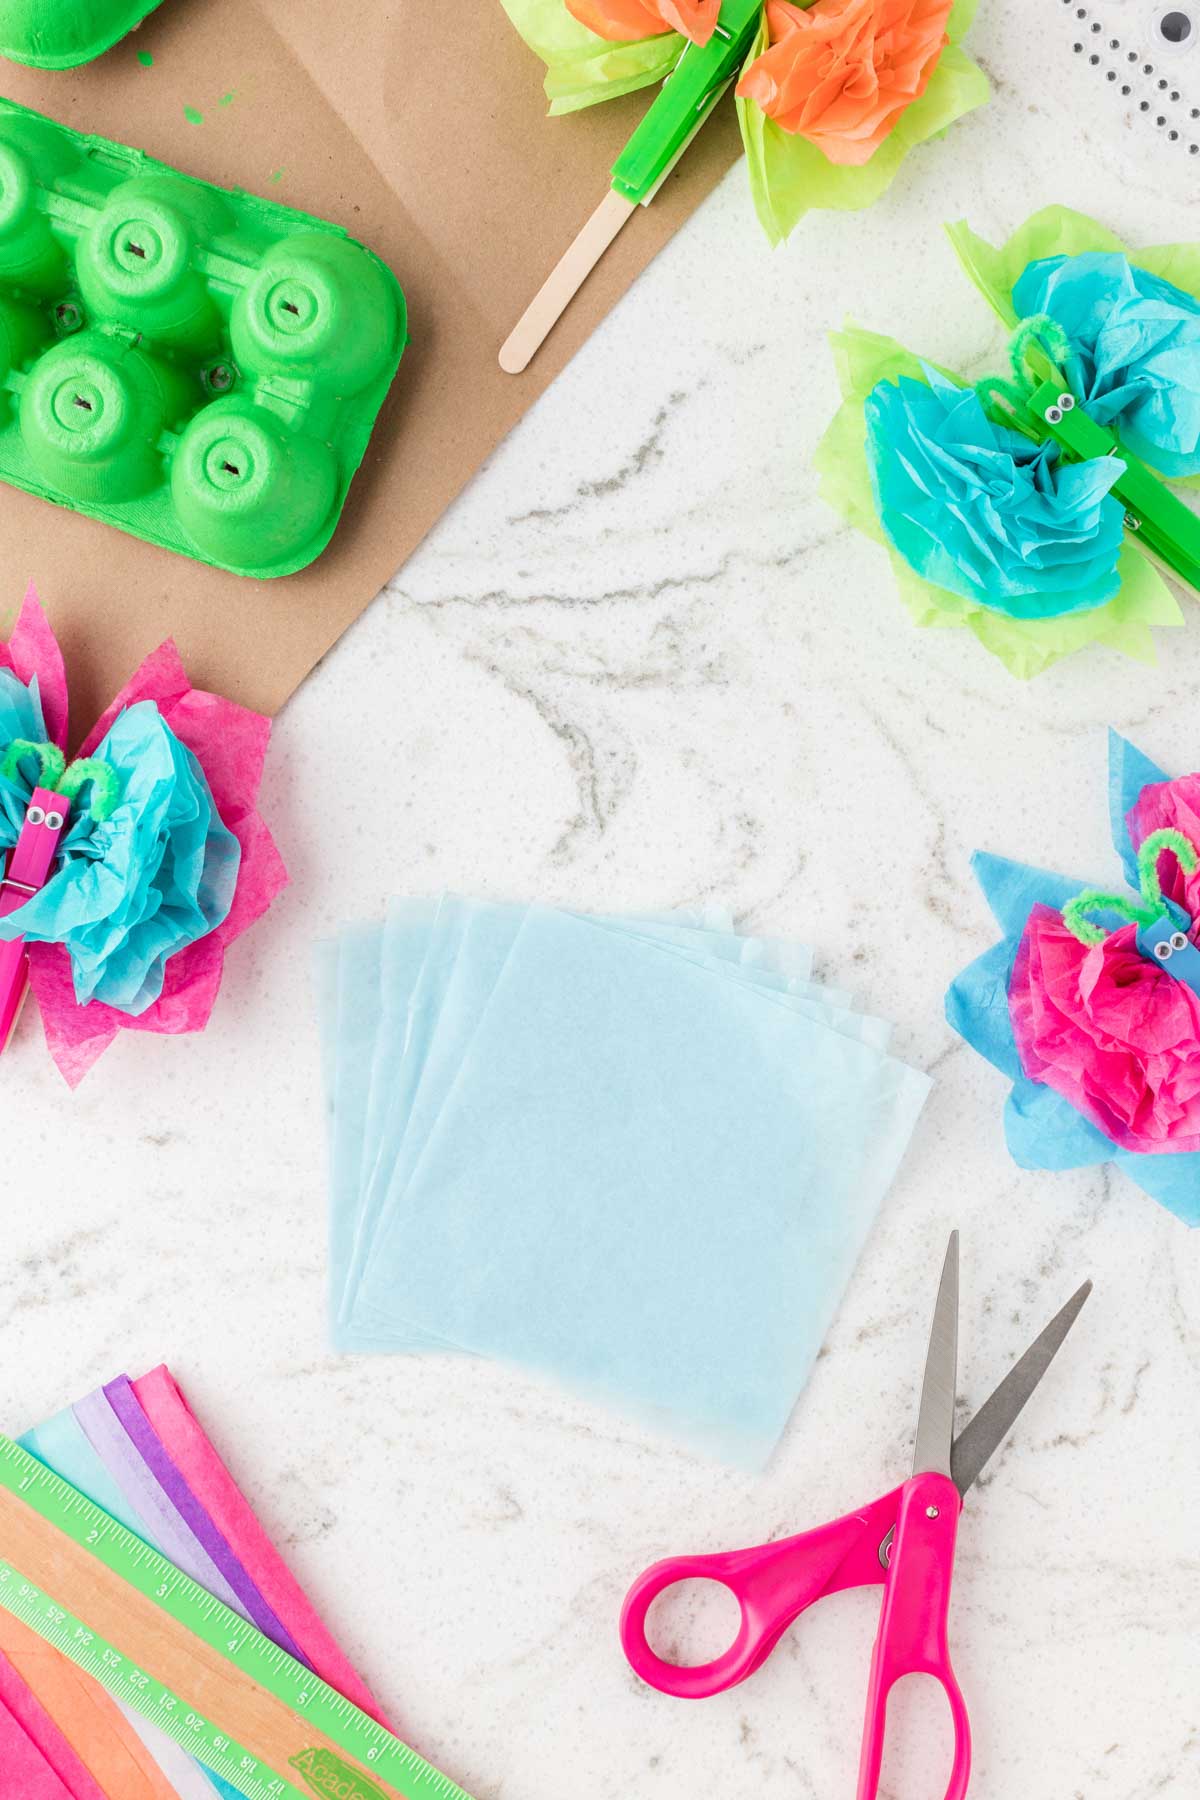
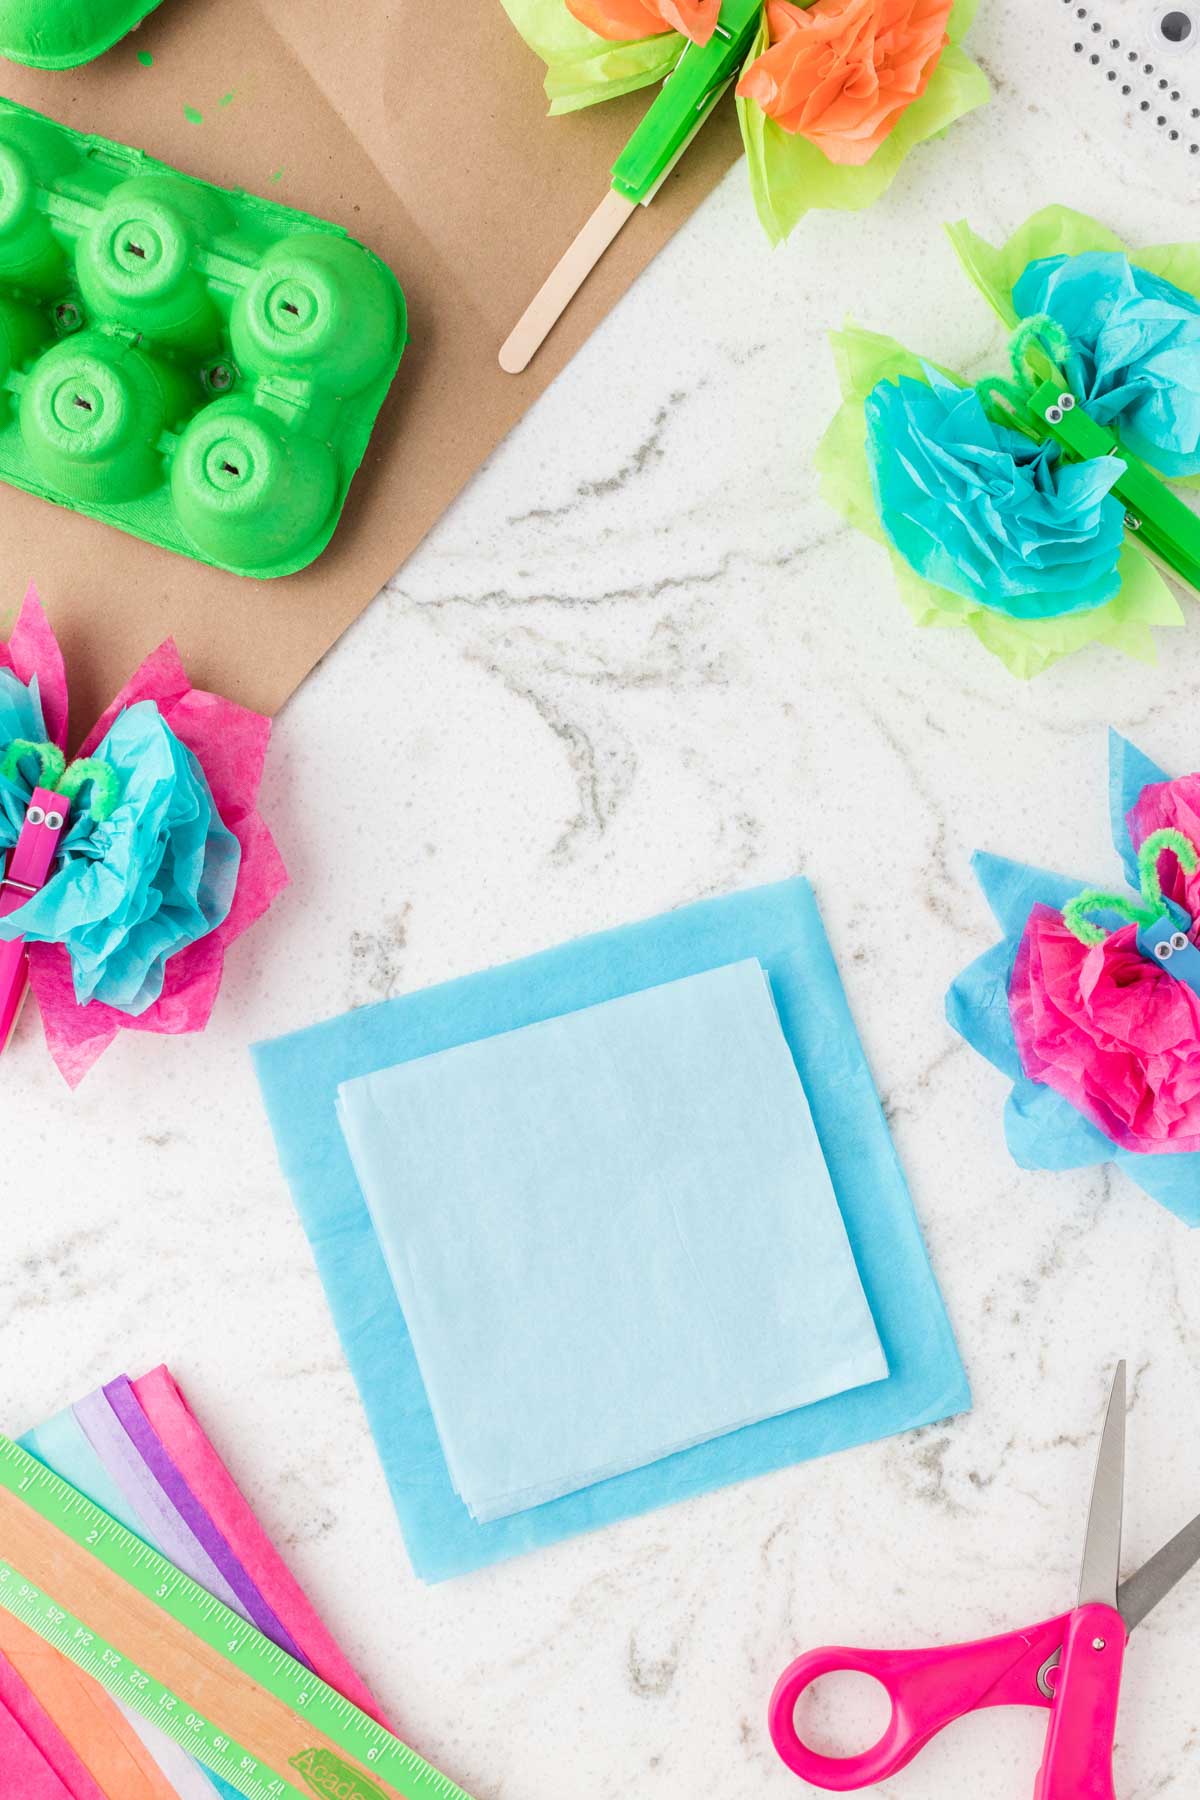
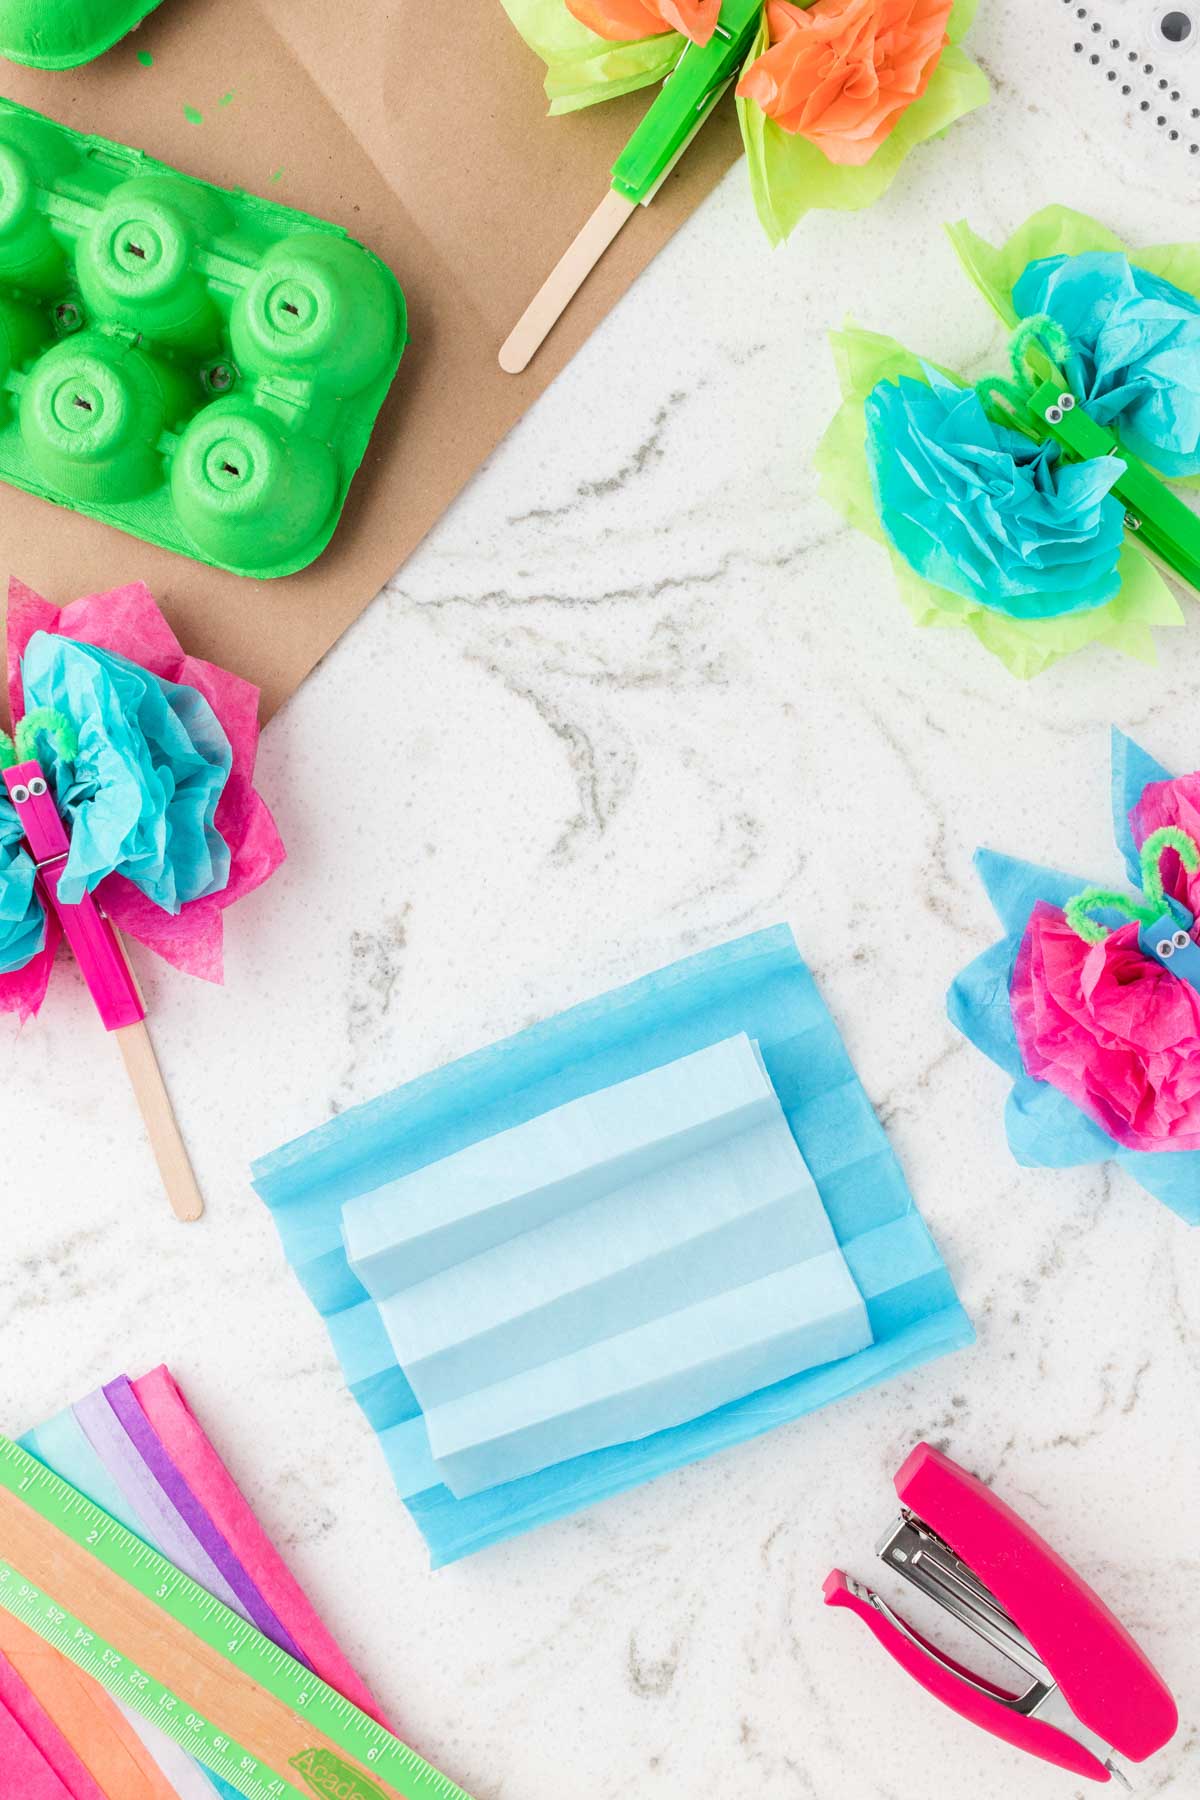
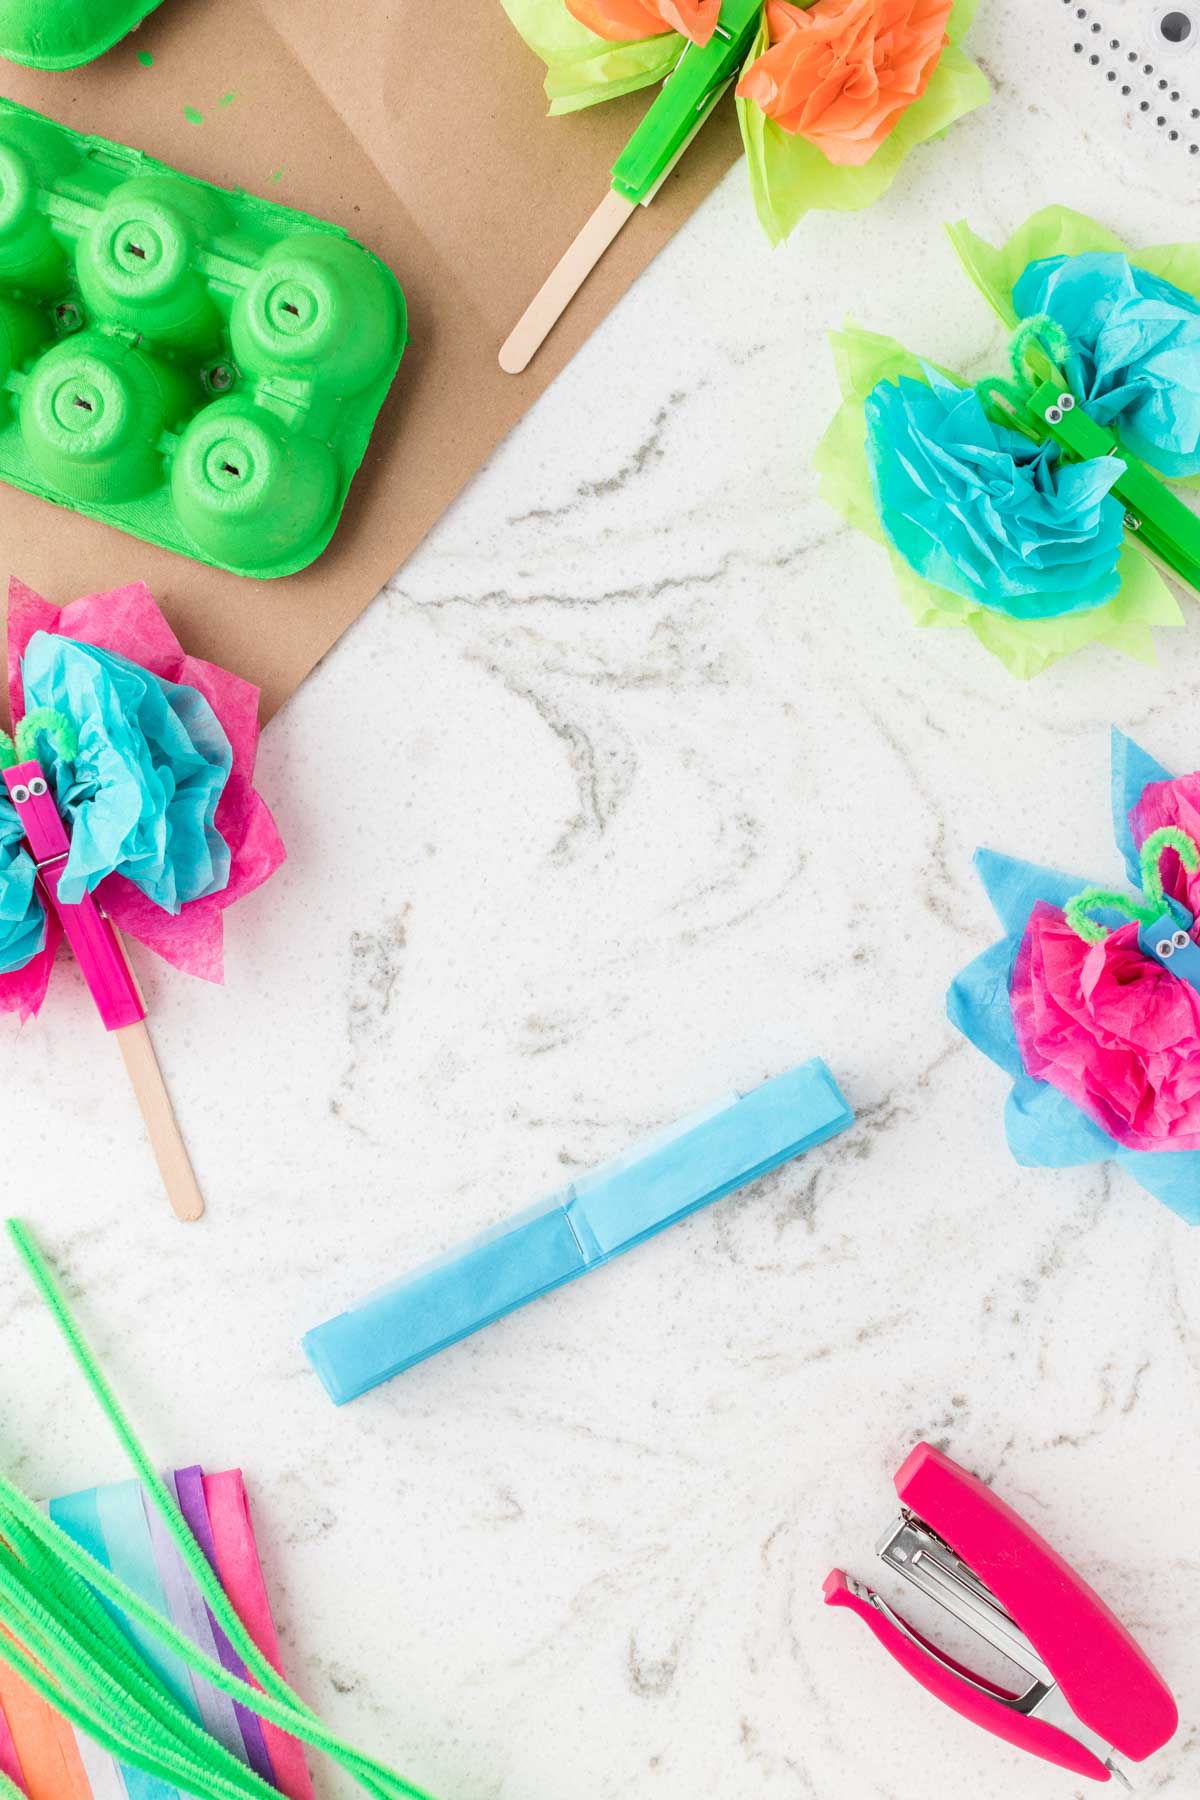
Each butterfly will need two different colors of tissue paper. Start by cutting six different 5×5 inch squares of one color of tissue paper. Stack them together and set aside. Next, take two pieces of a different color of tissue paper and cut two six by six inch pieces – slightly larger than the 5×5 inch pieces you cut previously. You can either use a ruler to measure or a craft mat like this one if you don’t have a ruler. Stack the two pieces of the second color of tissue paper on top of each other (and straighten them out). Then layer the first color of tissue paper on top of the second color, placing them right in the center so you have a 1/2 inch border from the edge of the paper. Once you’ve stacked the two colors of tissue paper on top of each other, fold them accordion style starting at the bottom of the tissue paper until you’ve reached the top. Hold your stack of tissue papers horizontally and staple the folded stack of the tissue paper so that the staple goes vertical into the center. I know this sounds confusing but just take a look at the picture below – you can see the tissue papers go right to the left while the staple in the middle goes up and down. This is important as it’ll make a difference in how your tissue paper butterflies fluff up. Once you’ve stapled the tissue paper, cut the corner of each end of the stack diagonally to create the wings of the butterfly. Then finally cut a green pipe cleaner in half and loop it around the center of the butterfly. Twist a few times to secure it onto the popsicle stick. Once it’s secure and twisted, cut the top of each of the pipe cleaners to form the butterfly’s antennas.
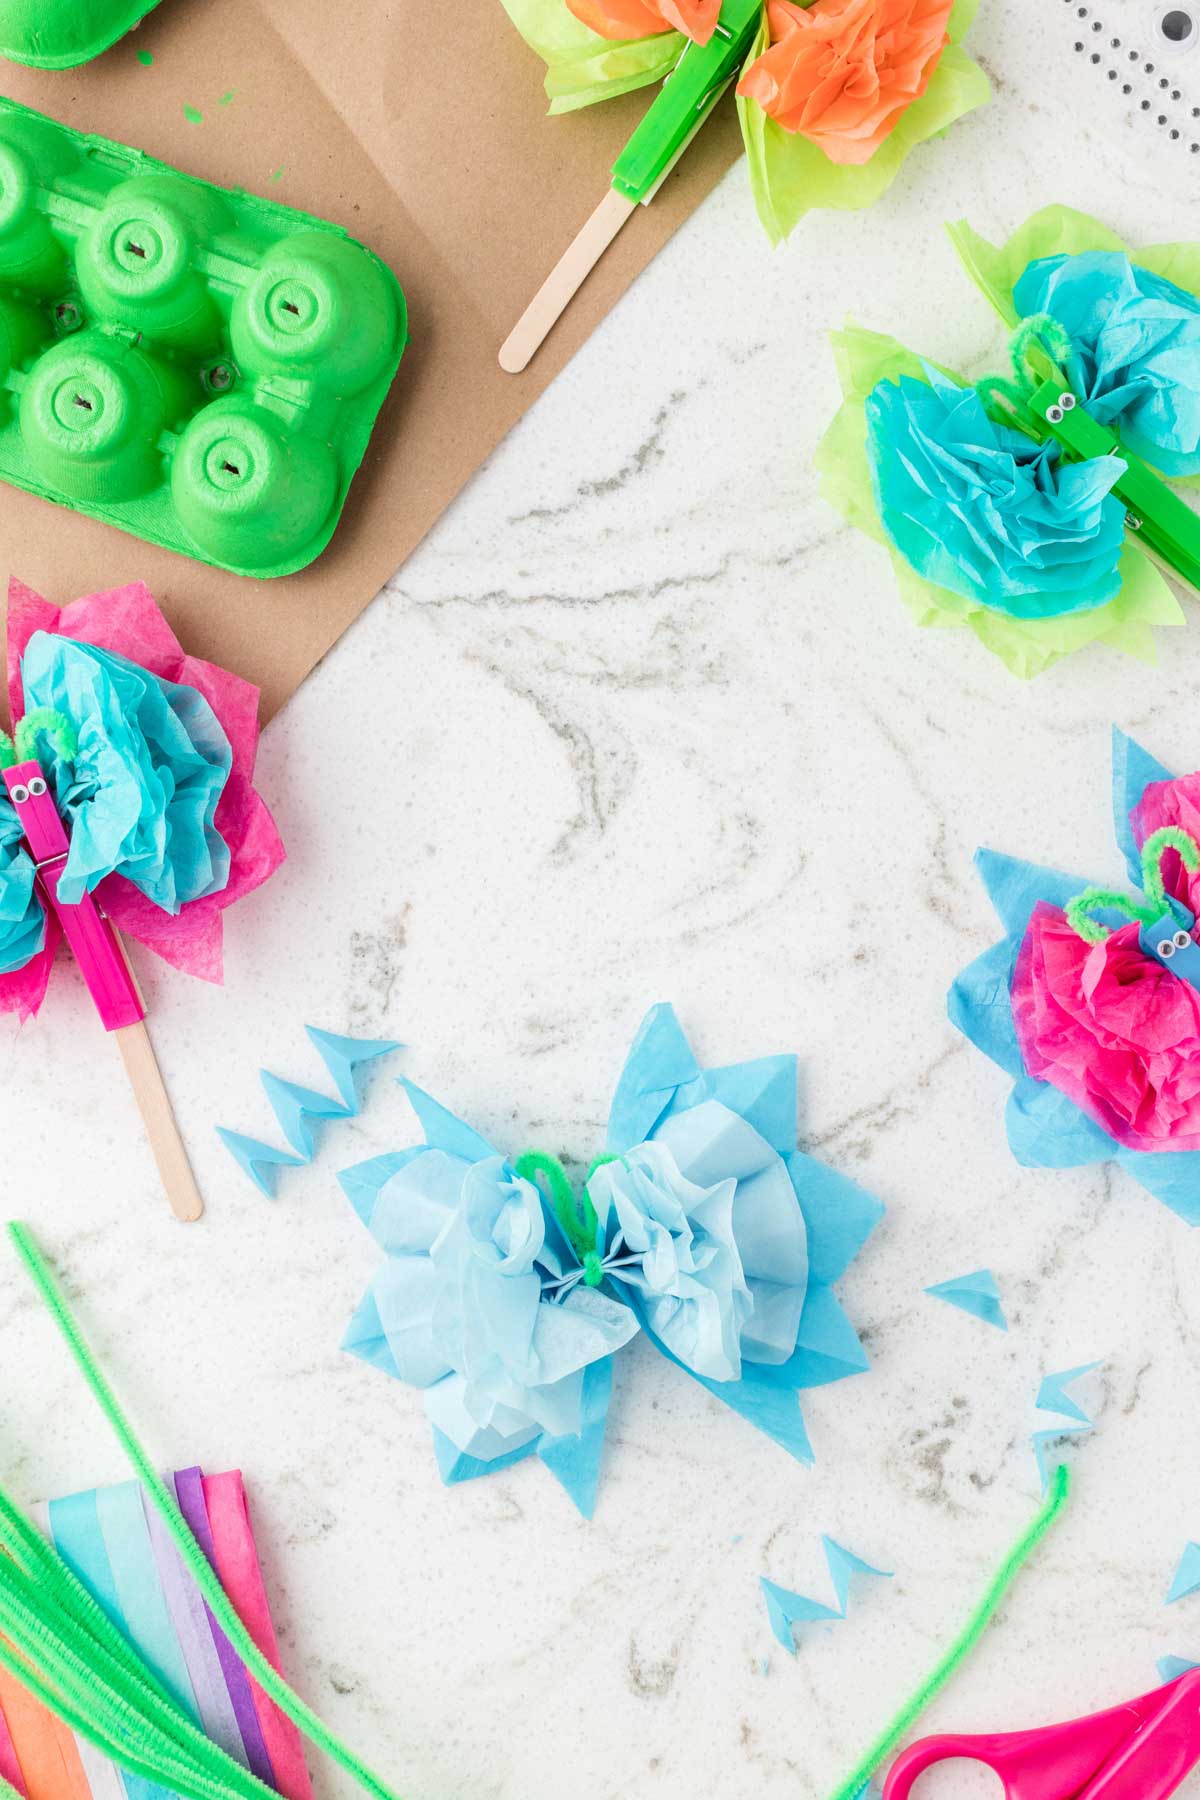
4 – Fluff the butterfly
Now that your butterfly is made, it’s time to make that butterfly fly! Carefully peel each layer of the center tissue paper toward the center of the butterfly. This will make the wings start to fluff up and look like a big beautiful butterfly. Repeat step 3-4 to create as many butterflies as you want before moving onto the next step. Or you can just move on, but I like to do all of the tissue paper twisting and fluffing all in one go.
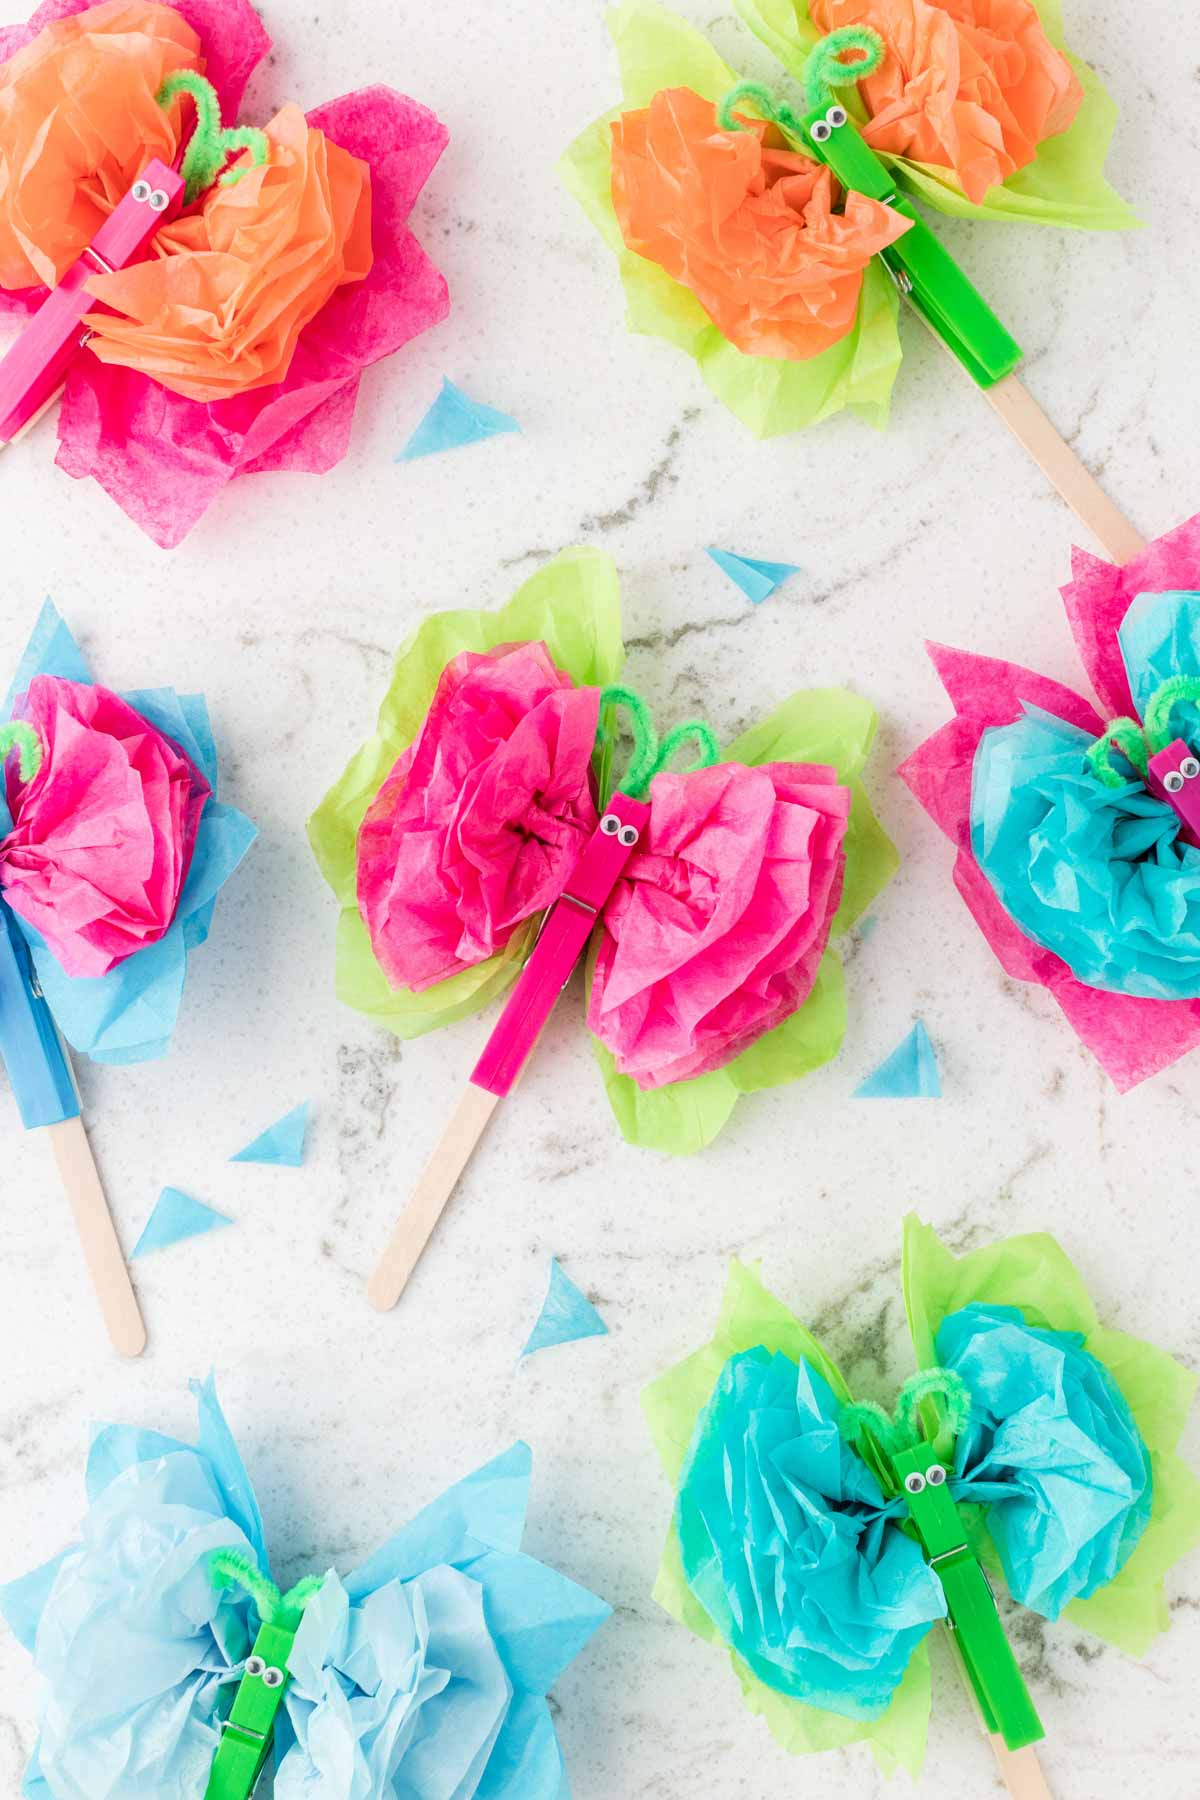
5 – Finish the Tissue Paper Butterflies
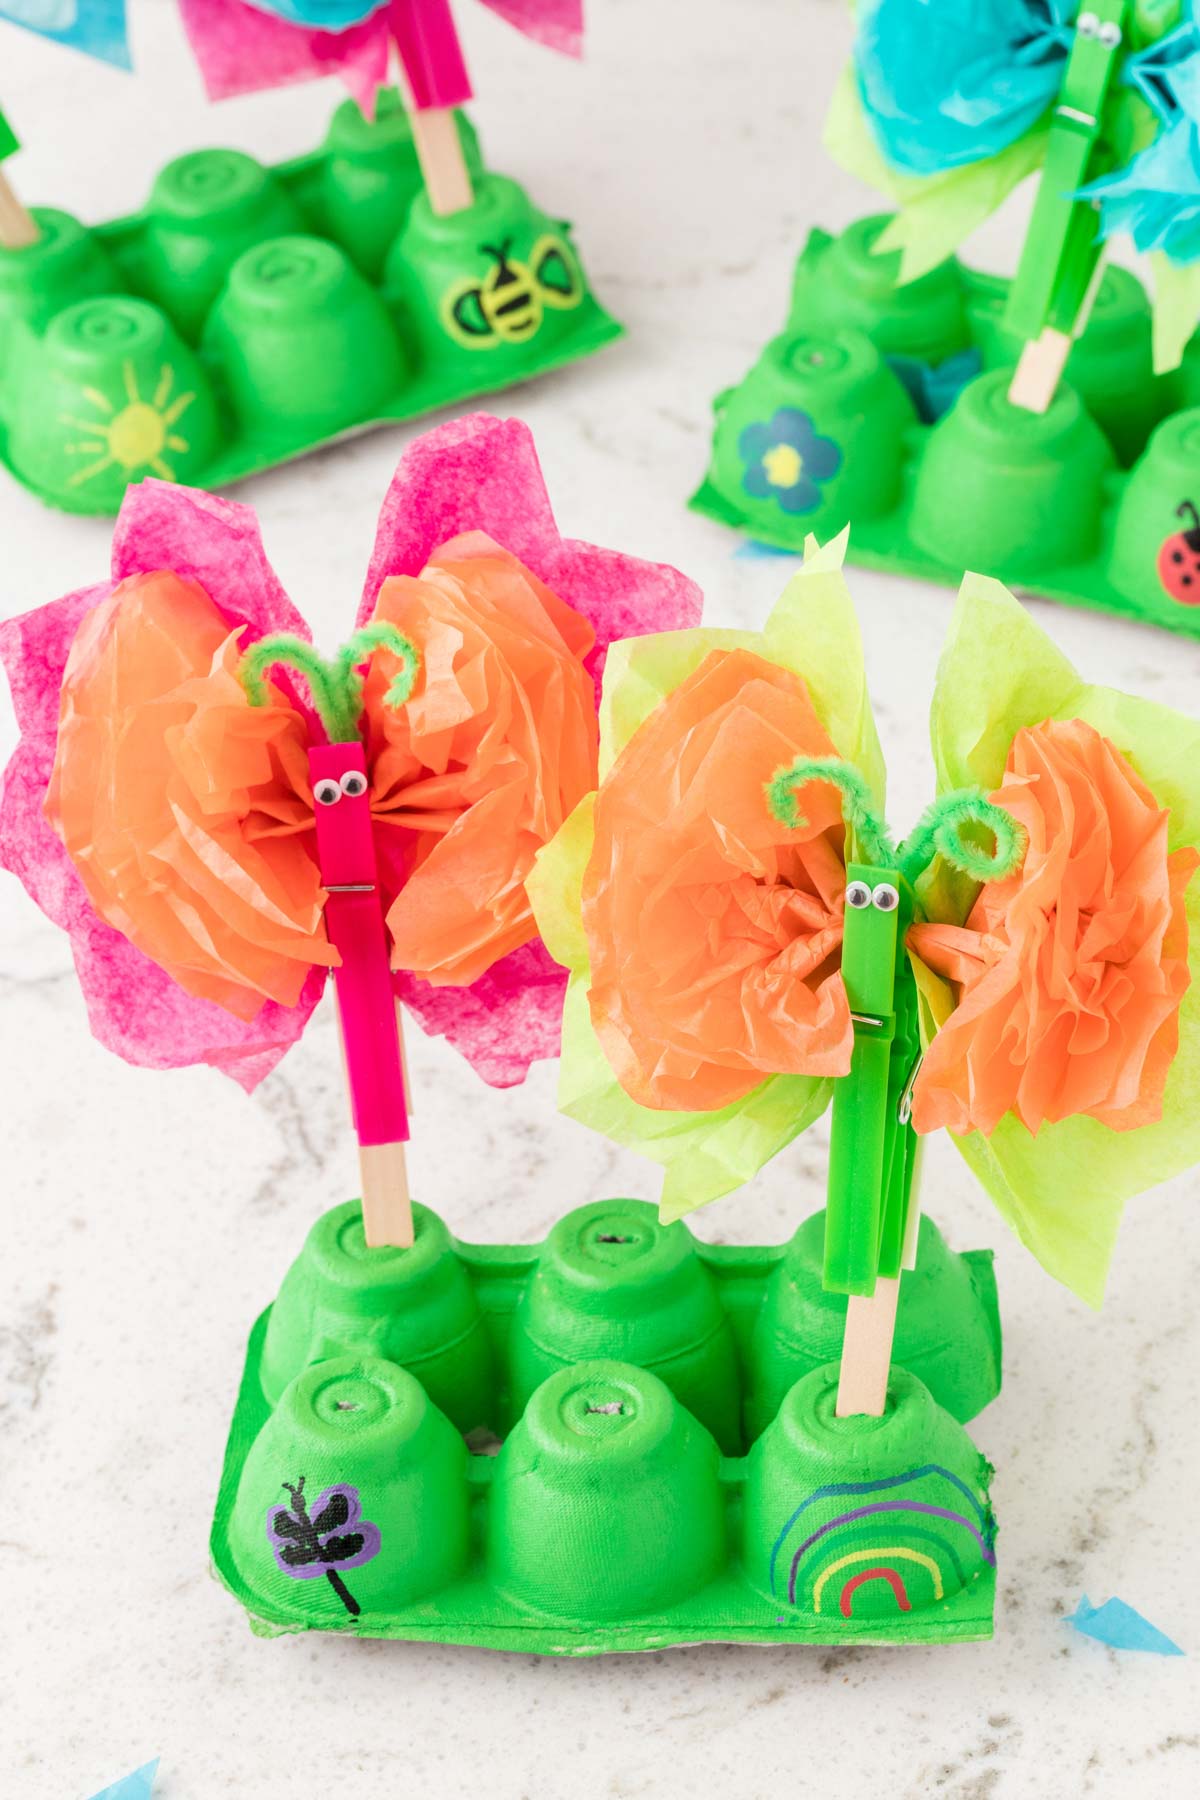
To finish the butterflies off, you’re going to add a body and some eyes! Clip a colorful clothespin to the center of each of the butterflies. Then add a set of googly eyes to each clothespins to make them even more fun! Lastly, cut a 1 1/2 inch piece of the double-sided tape and place one side onto the popsicle stick then connect the popsicle stick to the clothespin to connect everything all together. And your butterflies are complete and ready to fly in their very own garden!
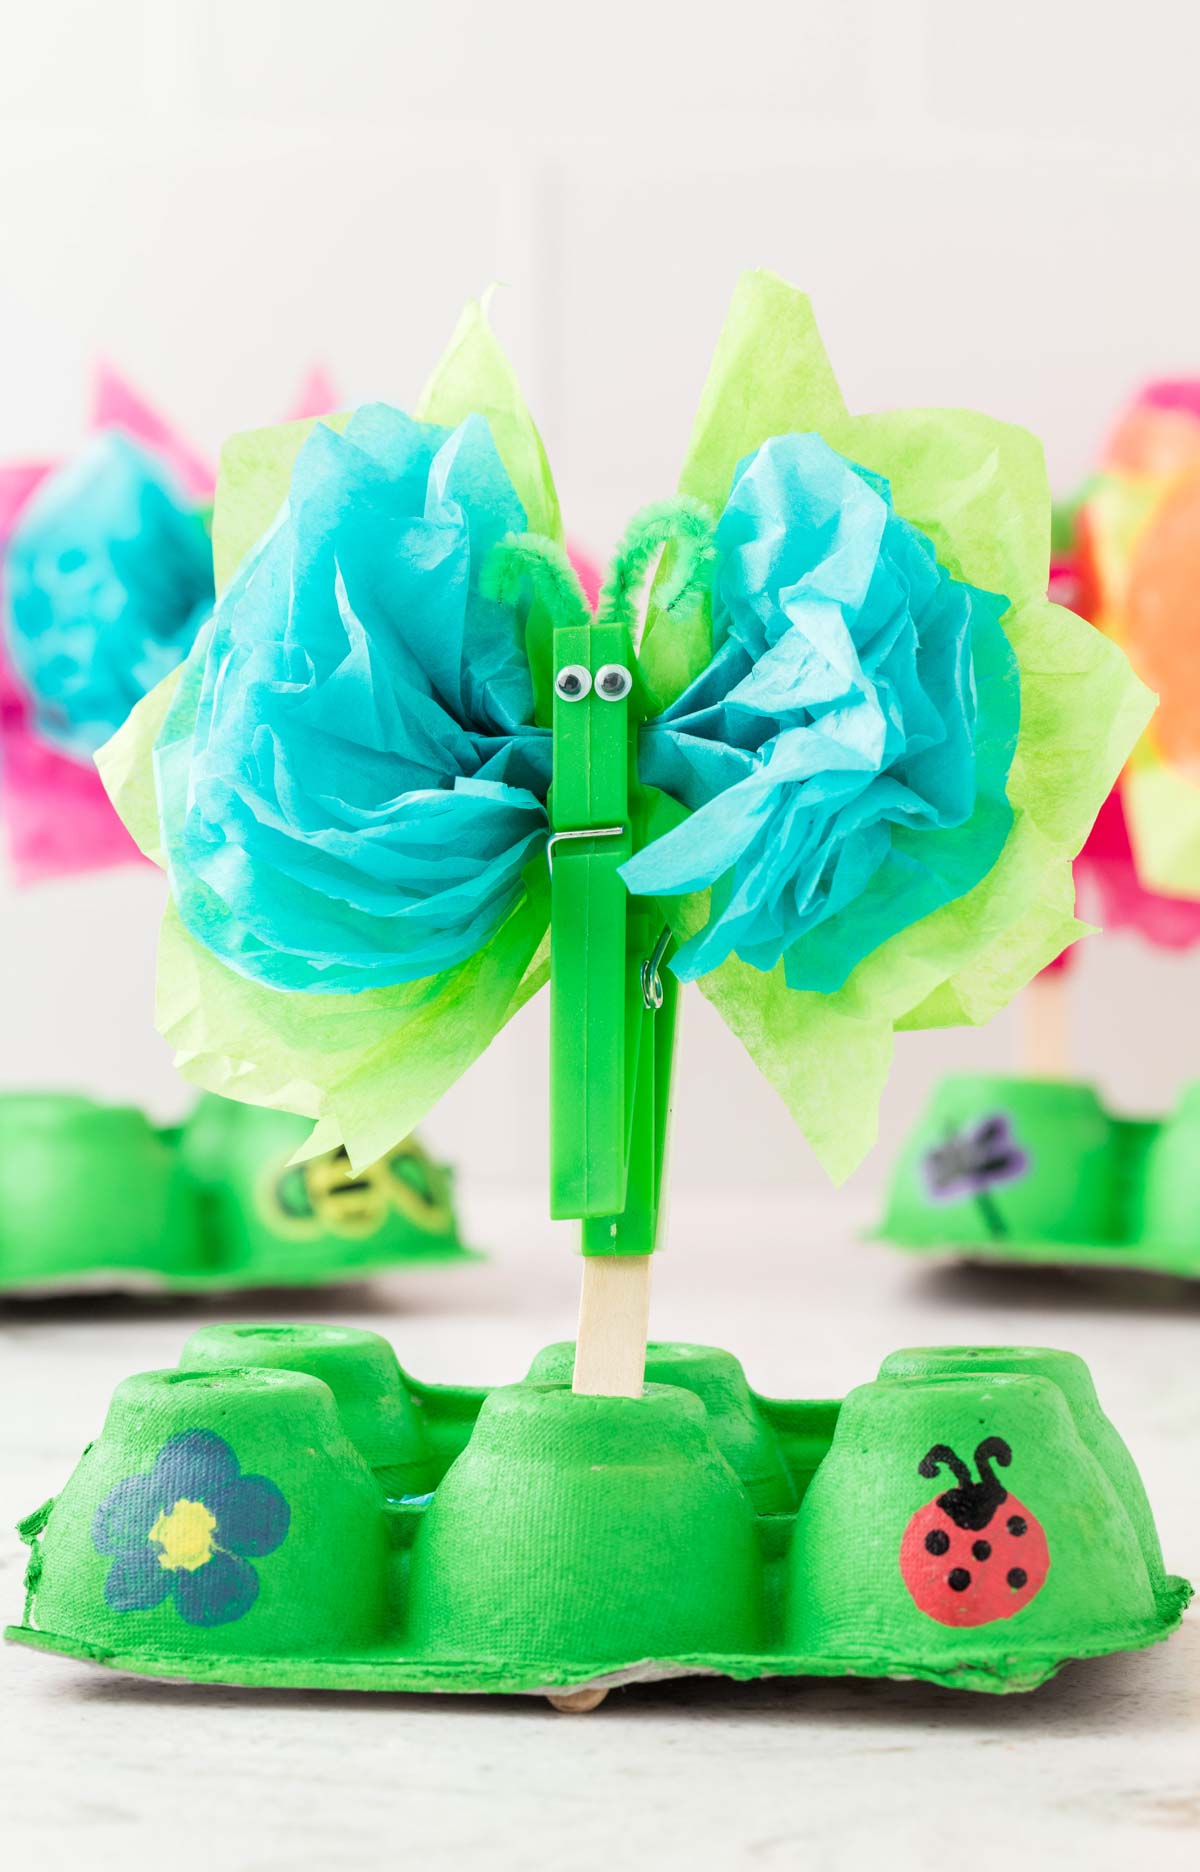
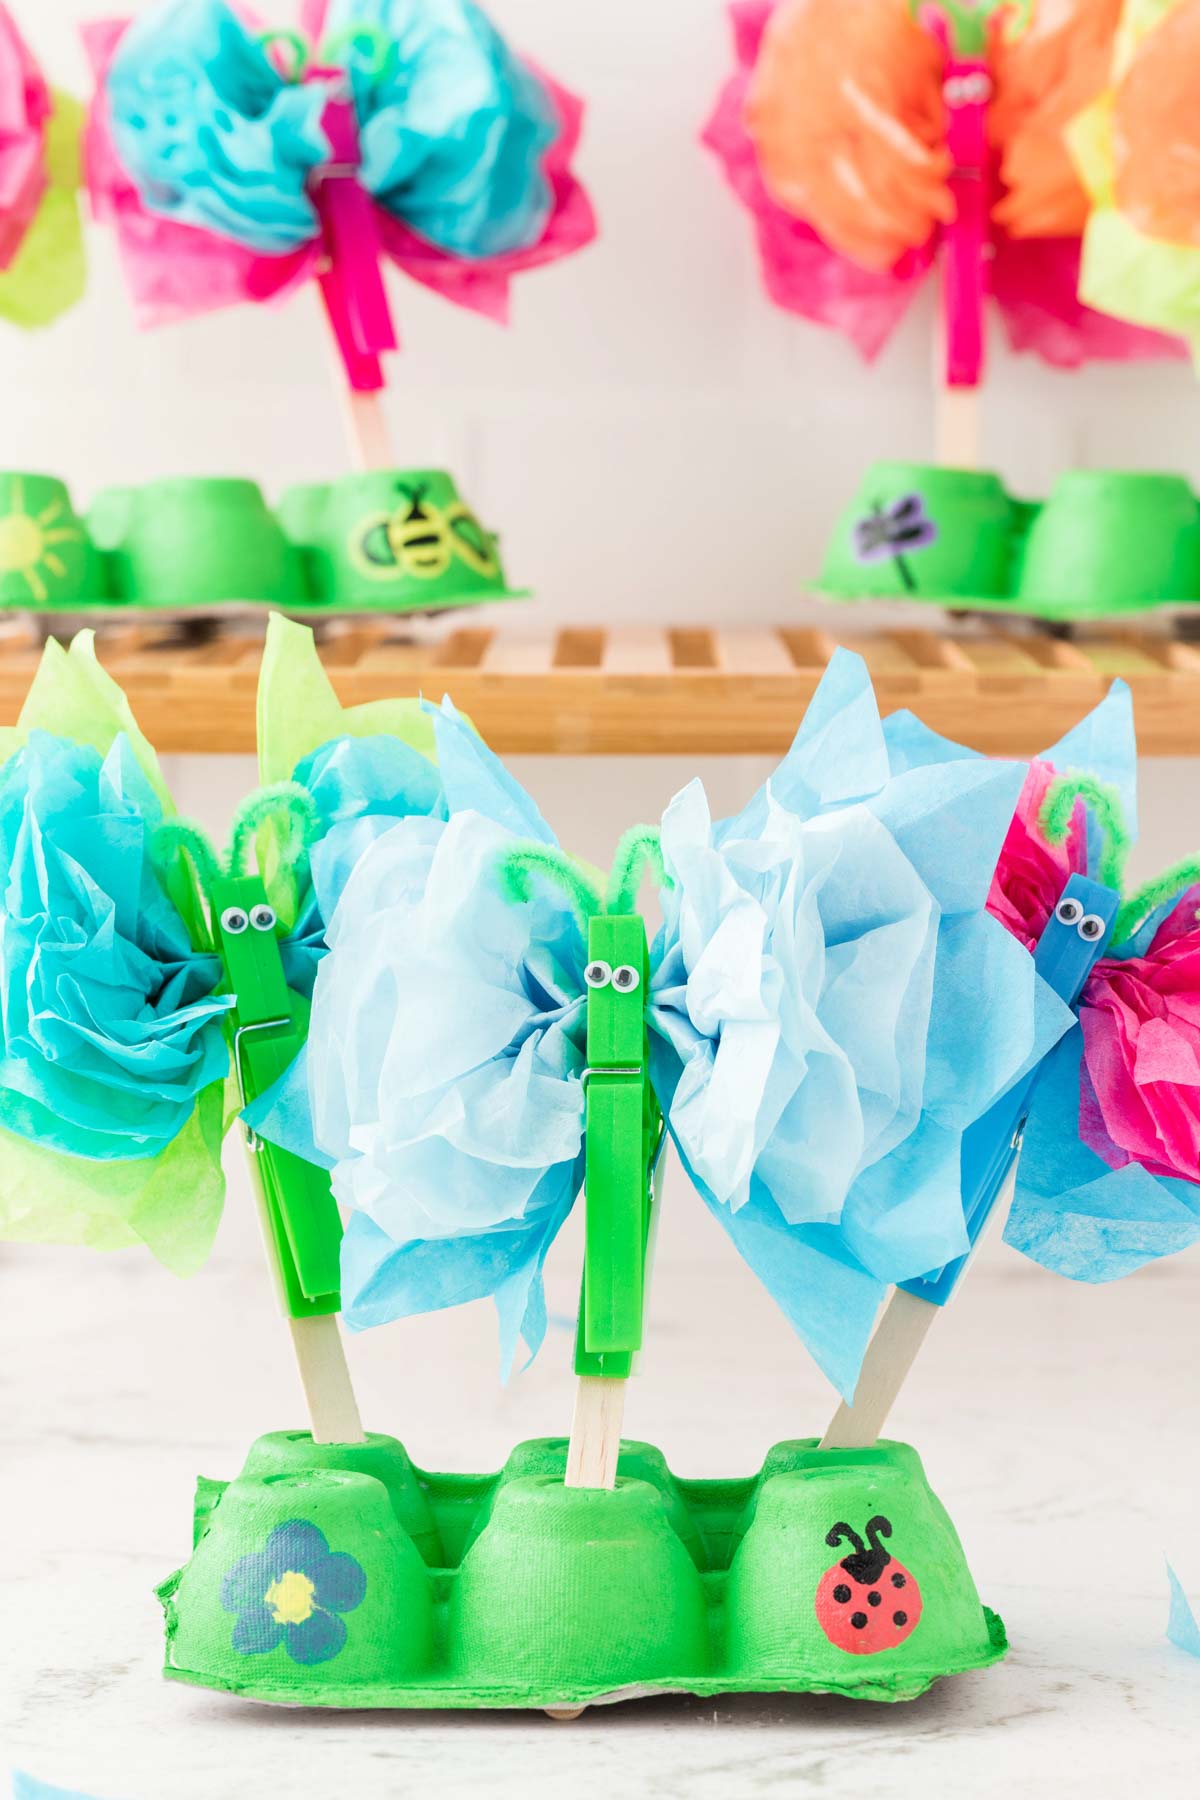
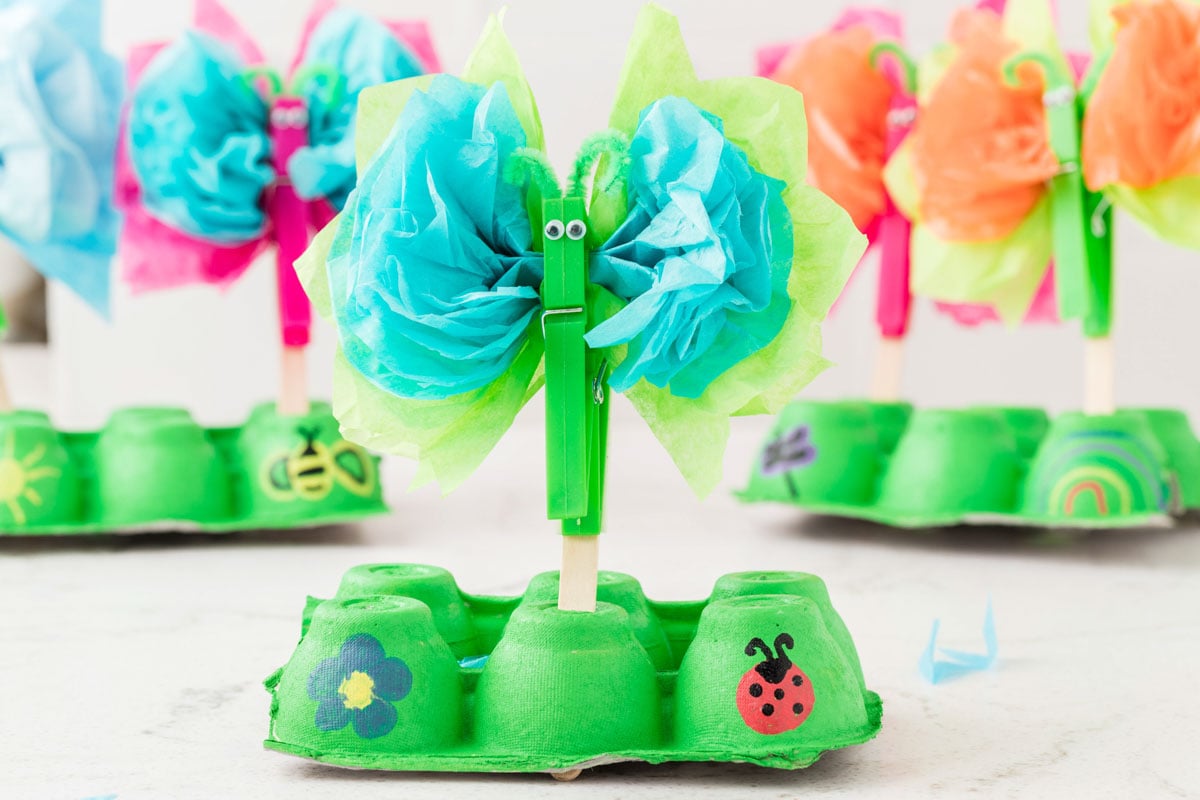
6 – Finish the Garden
Now that your egg cartons are dry, add your favorite designs using craft makers – rainbows, more butterflies, bugs, and really anything goes! Let these dry for just a minute then finish the craft by placing the popsicle sticks into the pre-cut slits in the painted egg cartons. And that’s it! Everything is ready to play with and enjoy! Kids will love taking their butterflies in and out of the garden and flying them around!
Expert Tips
Make this easy for the little ones. Pre-cut tissue paper squares and egg cartons before you even get started. Then the other stuff is pretty simple and kids love to help! Fluff the tissue paper gently so it doesn’t rip and you have to start all over again! Cover the table with a plastic tablecloth so when you’re done, you can just fold it up and throw it away – paint marks, extra staples, cut tissue paper corners, and more!
More Fun Spring Ideas
Make these tissue paper butterflies along with any of these fun spring ideas!
Easter egg game ideas – host an Easter egg olympics for a fun spring party activity! Spring games – tons of fun spring games to play with the entire family including a hilarious jelly bean challenge!Spring party ideas – everything you need to host any sort of spring event! DIY baby shower decorations – these fun spring inspired decorations are the perfect addition to any spring celebration!Easter bunny cupcakes – let kids make these cute Easter cupcakes, the best spring treat idea!