I’ve had two friends in the past week or so go do some fresh blueberry picking. They both made blueberry yogurt muffins but past that they weren’t quite sure what to do with them. I wish I’d had today’s recipe to point to when were talking because these are so delicious with fresh summer blueberries! If you like blueberries and you love cheesecake, you’re going to love these blueberry cheesecake bars. They have a fresh blueberry flavor but also a nice sweetness and creaminess from the creamy cheesecake filling. And they’re the perfect way to use up all of those blueberries from blueberry picking or the grocery store. They’re one of my favorite dessert recipes I’ve made all summer (and I’ve made a lot).
Why You’ll Love This Recipe
Combination of flavors – the layers of crust, creamy cheesecake, fresh blueberries, and crumble topping really just give each bite of these an amazing flavor and texture! That crumble topping is my favorite part! Enough for a crowd – most baked cheesecake recipes feed about eight people. Make these these easy blueberry cheesecake bars and you can feed 16! You could even double this recipe and feed a whole crowd! Good for the whole family – sometimes fresh blueberries can be so tart that they’re not real fun to eat. These blueberry cream cheese bars are great because the added sweetness in the bars helps to counteract any tartness of the blueberries! Perfect for any age!
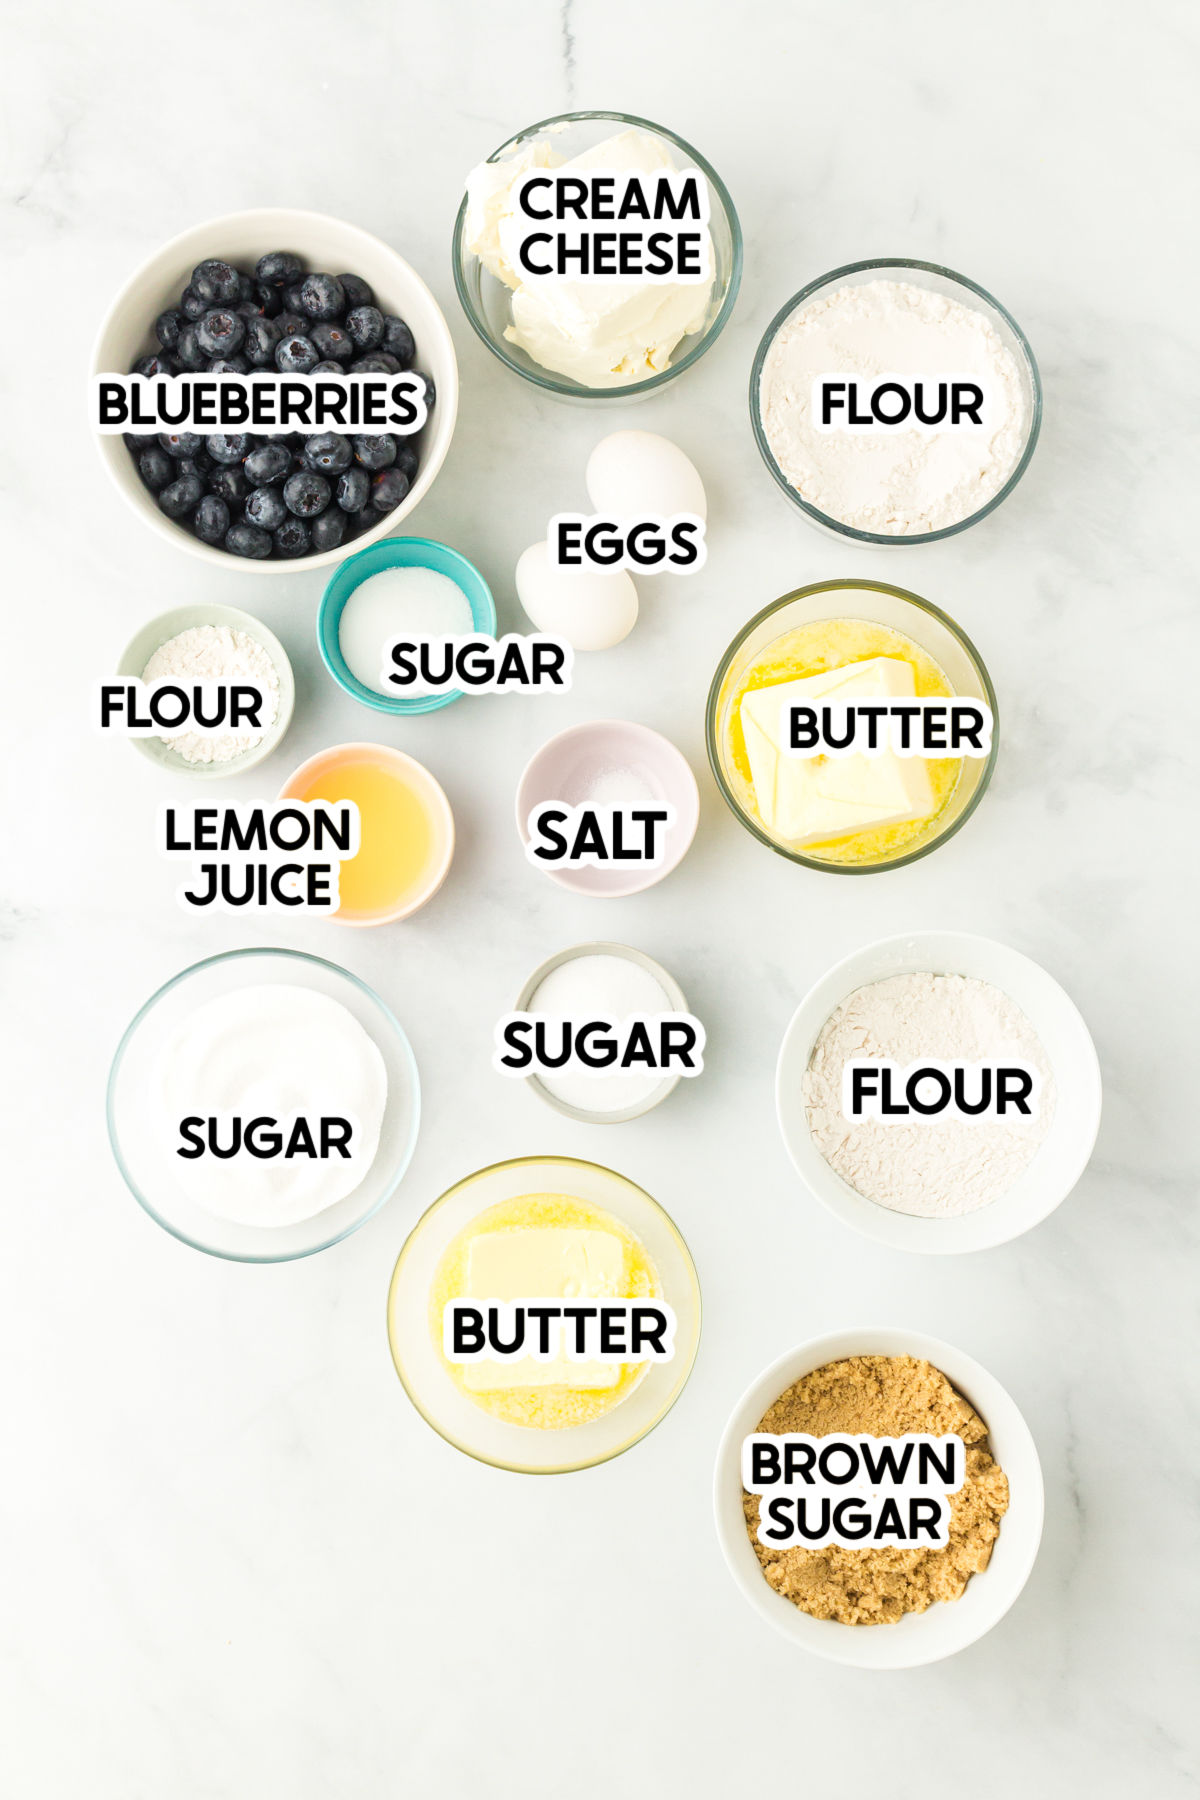
Ingredients
Ingredient Notes
While it may look like a lot of ingredients in the picture above, have no fear – many of the ingredients (like flour) are just used a couple of times in the recipe. I wanted to show you the amounts, which is why they’re in there twice! There are really only about 1/2 the ingredients shot in the picture! That being said, just a couple of notes on them before you get started baking.
Butter – you want to use unsalted butter that’s been slightly melted (but not completely melted) so it’ll mix in nicely with the dry ingredients. You can do this either by heating in the microwave for 30-40 seconds or in an oven but watch it closely so it doesn’t completely melt. Cream cheese – make sure it’s softened to room temperature. I typically like to take it out about an hour before I’m going to make the cream cheese filling. Blueberries – I highly recommend using fresh berries for these blueberry swirl cheesecake bars, but if you only have frozen just make sure to let them thaw to room temperature and strain out any extra juice before adding them to the cream cheese layer. You want juicy blueberries but naturally juicy, not juice that’s actually frozen ice melted into water. Lemon juice – I highly recommend using fresh lemon juice in these, squeezed from an actual lemon. Bottled lemon juice works for some things but it doesn’t have the same flavor as fresh squeezed. The tartness of the lemon really mixes well with the blueberries. You only need two tablespoons, so you’ll only need one large or two medium lemons. Eggs – you want to use large eggs and ideally get them out at the same time as the cream cheese, so they can come to room temperature as well. This will help your cream cheese layer mix together more smoothly.
How to make blueberry cheesecake bars
I’ll be honest, this recipe does take a few steps and the recipe card at the bottom might look overwhelming. But all of those steps are simple so be patient, keep going, and in the end you’ll have hopefully one of your new favorite desserts to enjoy.
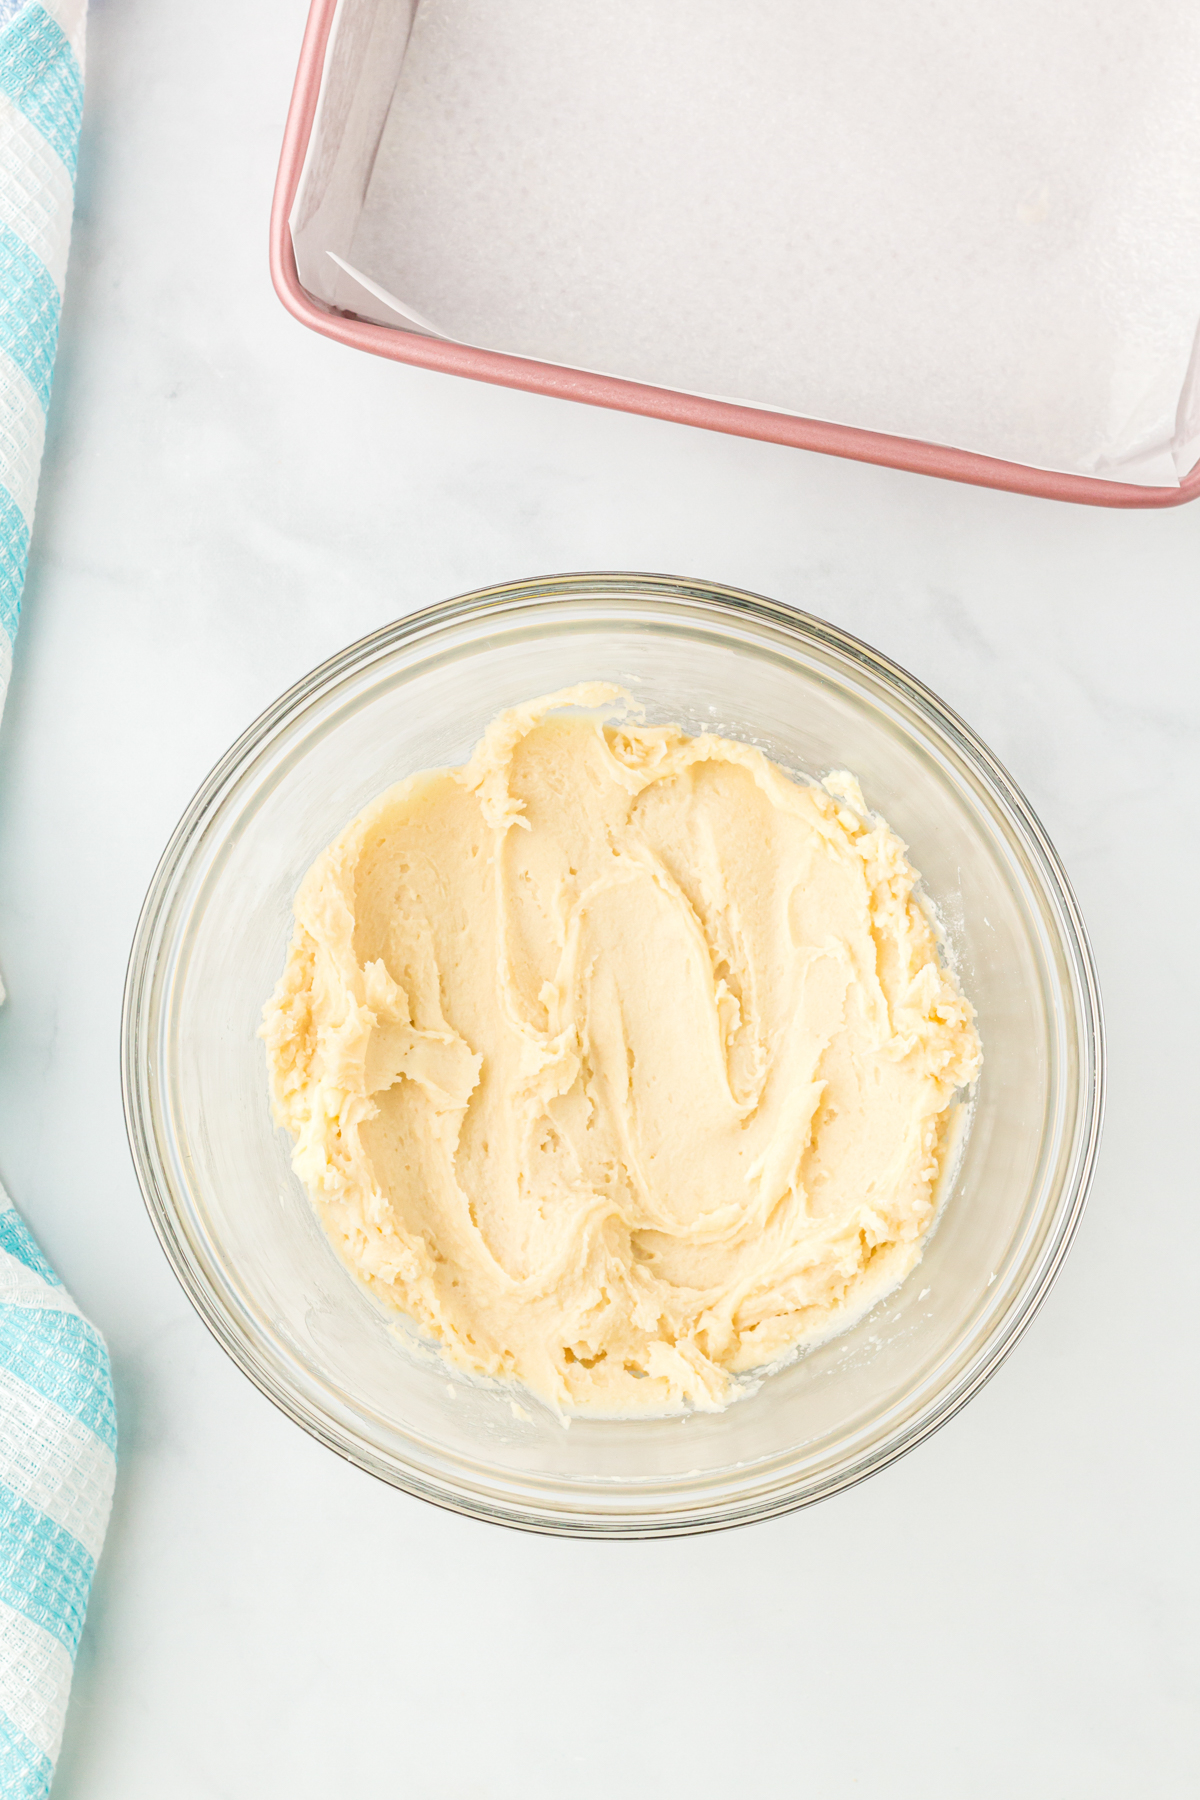
1 – Make the Crust
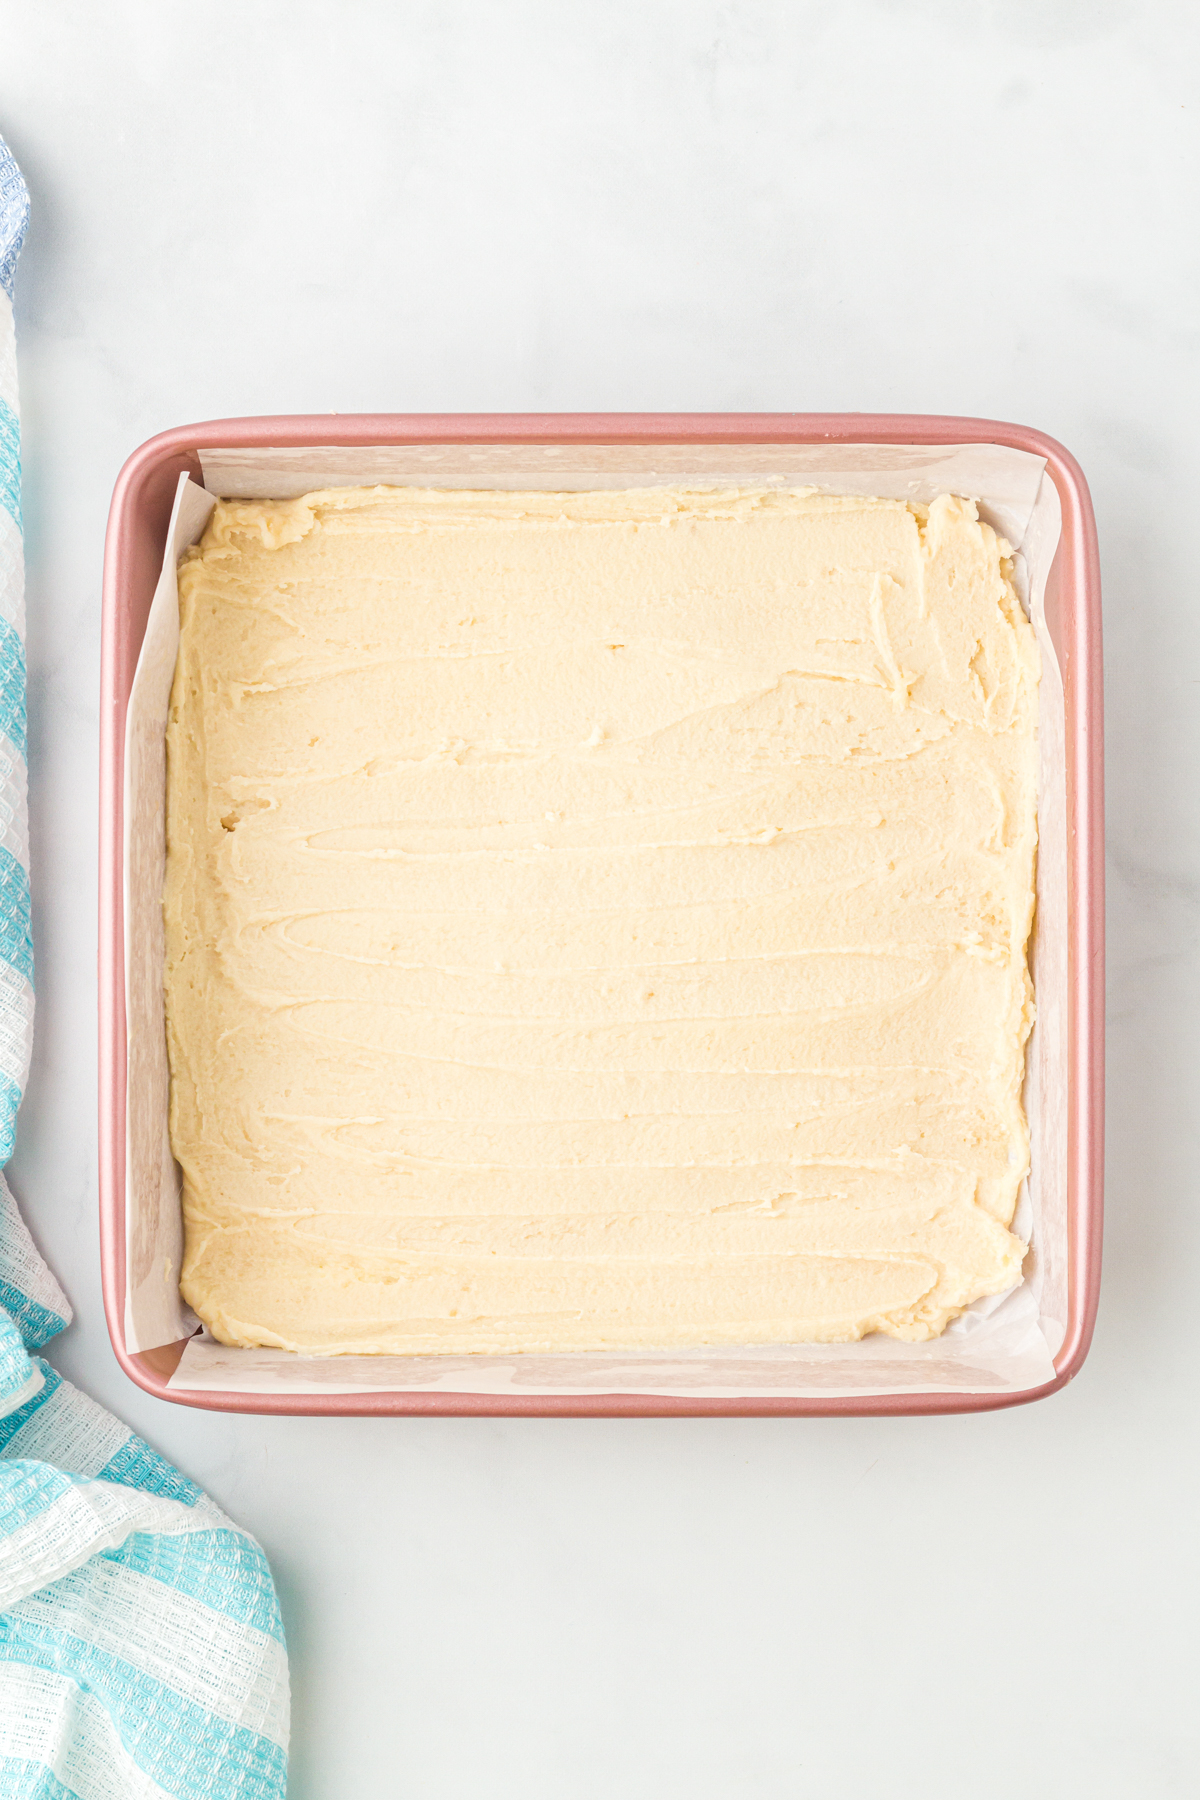
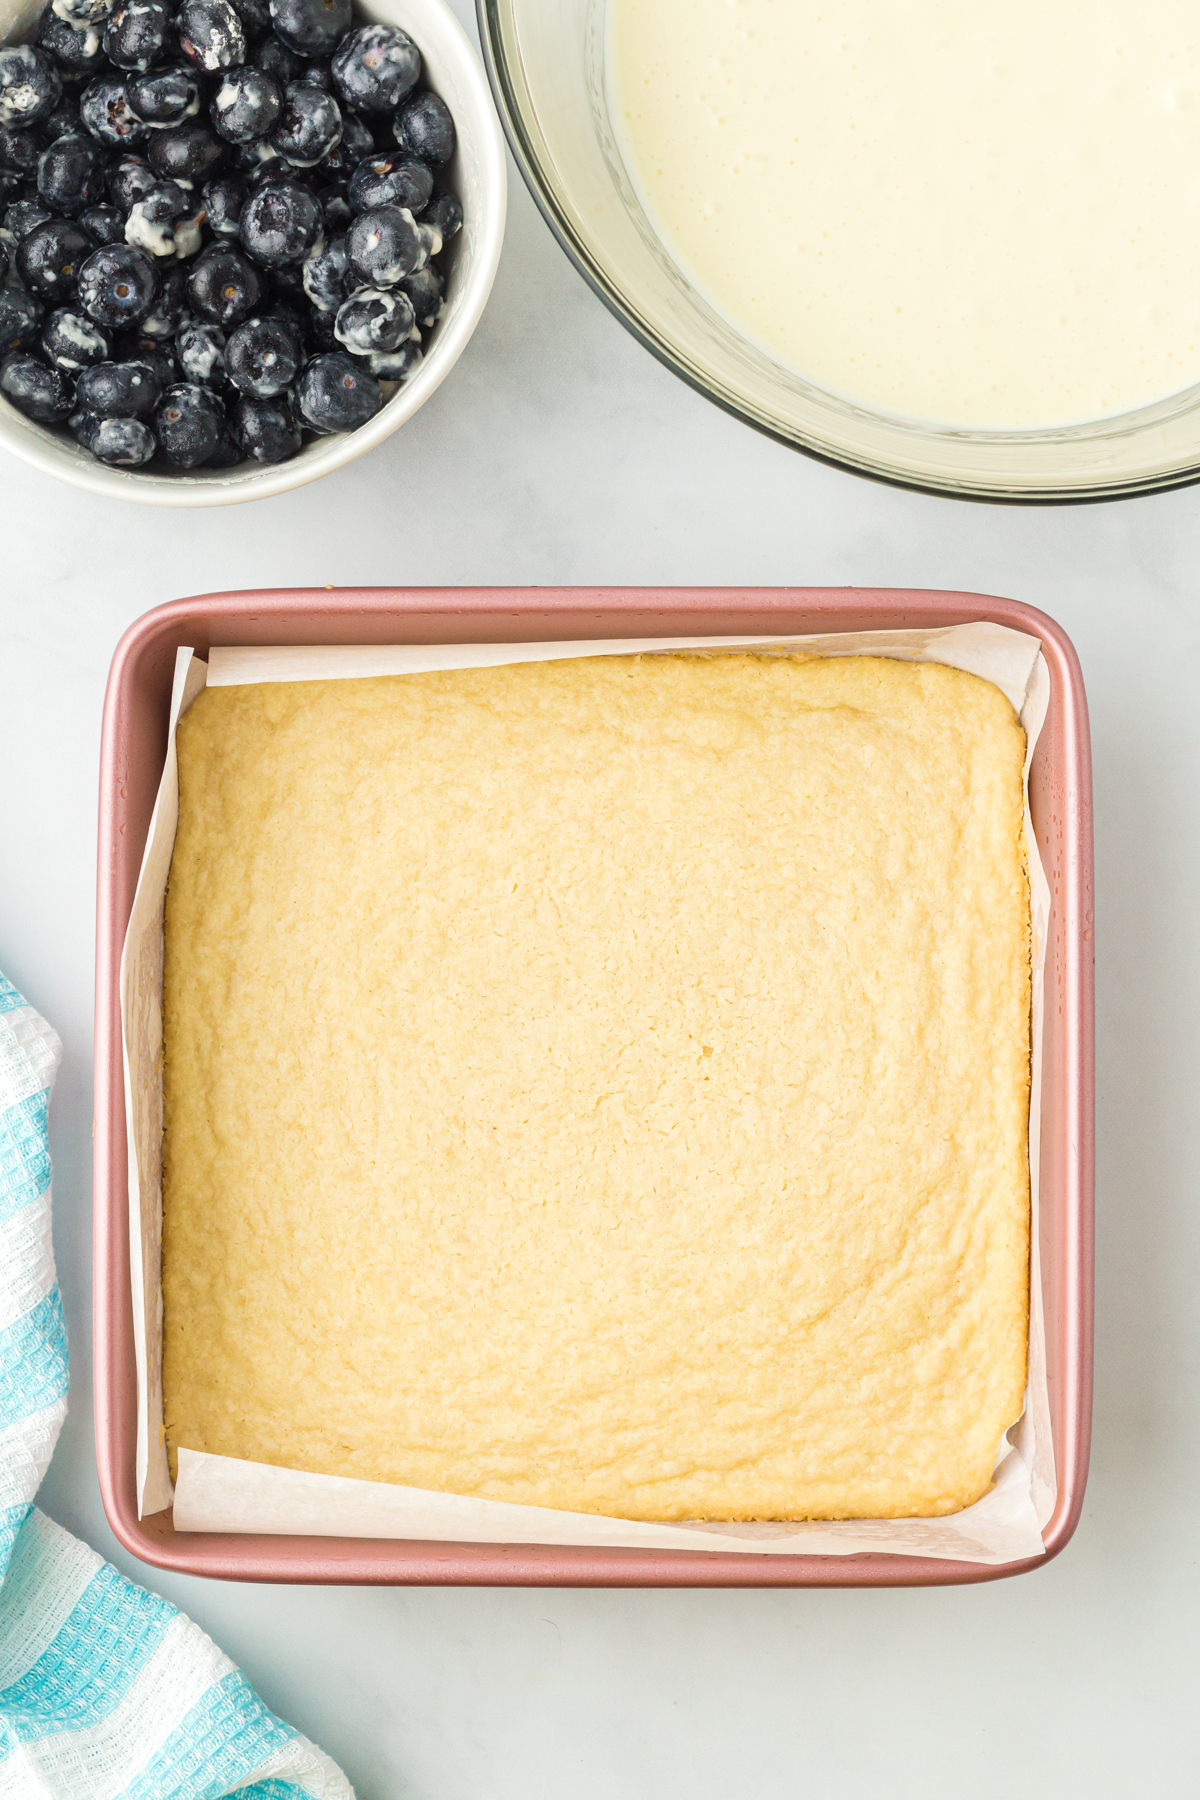
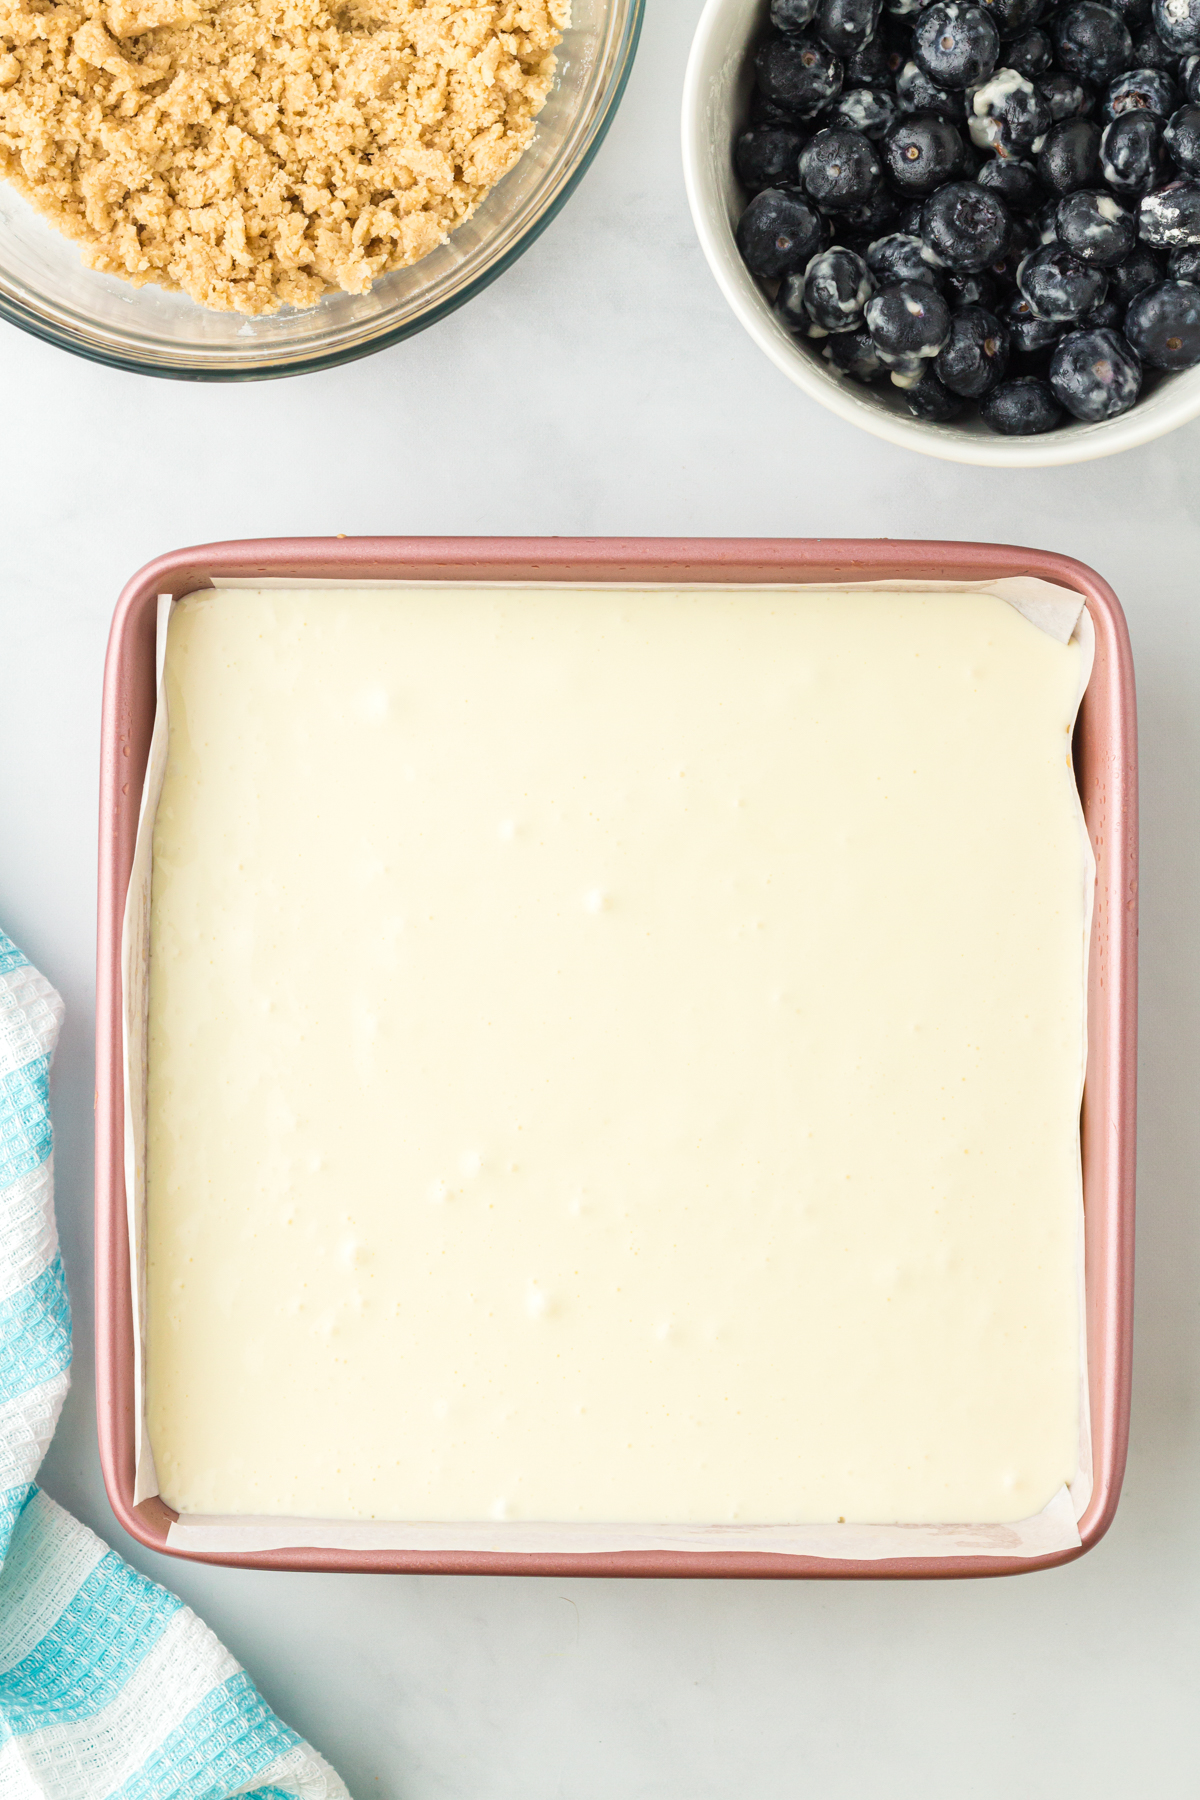
First, preheat your oven to 325°F and spray an 8″ x 8″ square pan with non-stick cooking spray. After it’s sprayed, line with parchment paper. Make sure the parchment paper edges extend slightly above the edge of the baking pan so the cheesecake will be easy to lift out. To make the crust, combine flour, slightly melted butter (you’ll need just one cup butter for the crust – the other butter will be for the crumble on top), sugar, and salt in a medium bowl, then beat until the flour is incorporated. I like to do with this with electric mixer (or hand mixer) to ensure the butter gets nice and beat in. You don’t want pockets of butter just hanging out in the crust. Next, spread the crust evenly in the bottom of the prepared pan. You can use a spatula coated in non-stick cooking spray to help spread the dough all the way to the edges of the bottom of the pan if you need, or just use your fingers. Bake the crust for about 20 minutes, or until the edges are very lightly browned. If the crust starts to bubble up, use a fork to poke a few holes in the bottom of the crust. Allow the crust to cool for at least 20 minutes before adding the filling.
2 – Make the Cheesecake Filling
While the crust is cooling, prepare the cheesecake filling. In a large bowl, beat the cream cheese until it is completely smooth for a few minutes. This helps with making sure the cheesecake layer is nice and smooth. I typically just let it beat in my mixer at high speed for 1-2 minutes until smooth. Next, beat in the eggs and sugar and mix until well combined. I found that you need to mix a bit longer than you’d think and make sure to scrape down the sides as you go. Once the mixture is ready, pour it over the cooled crust. Oh and make sure to heat oven again if you turned it off.
3 – Make the Blueberry Mixture
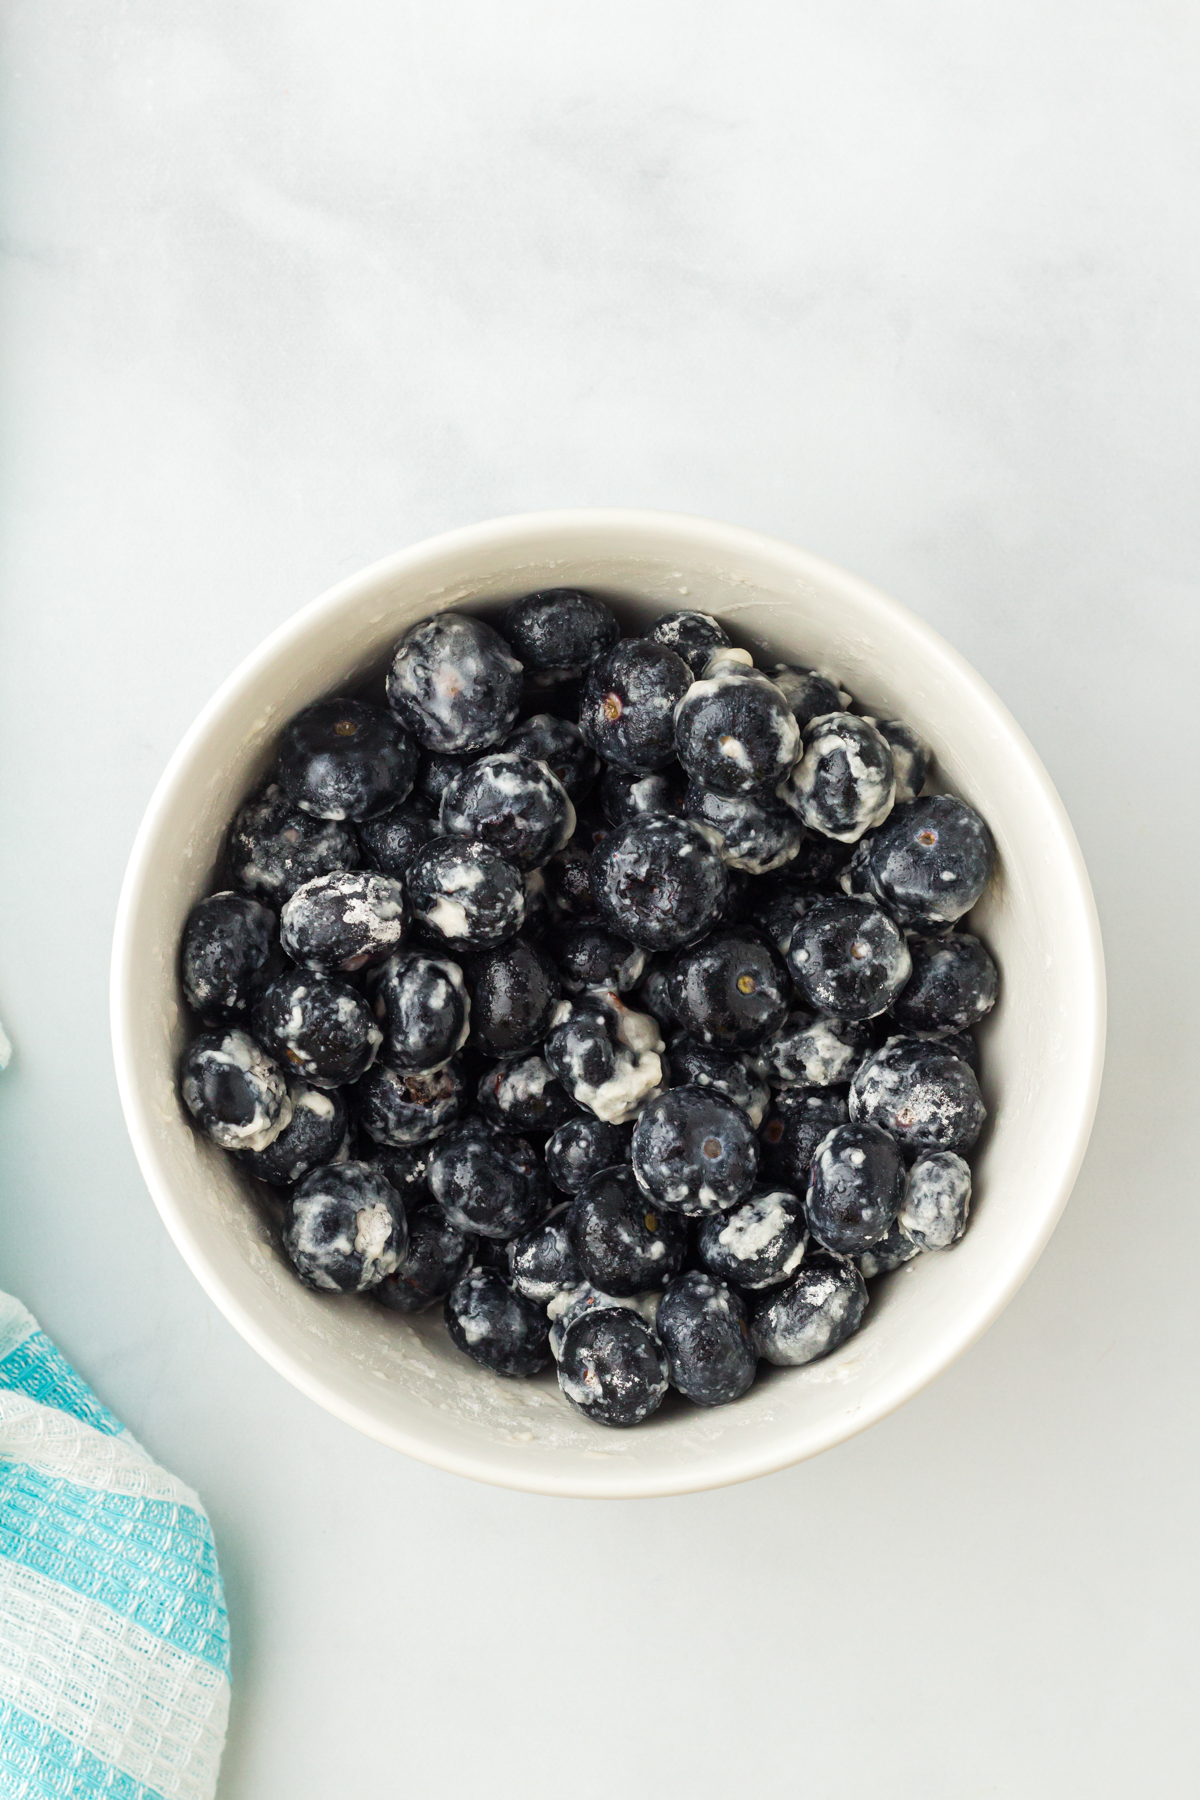
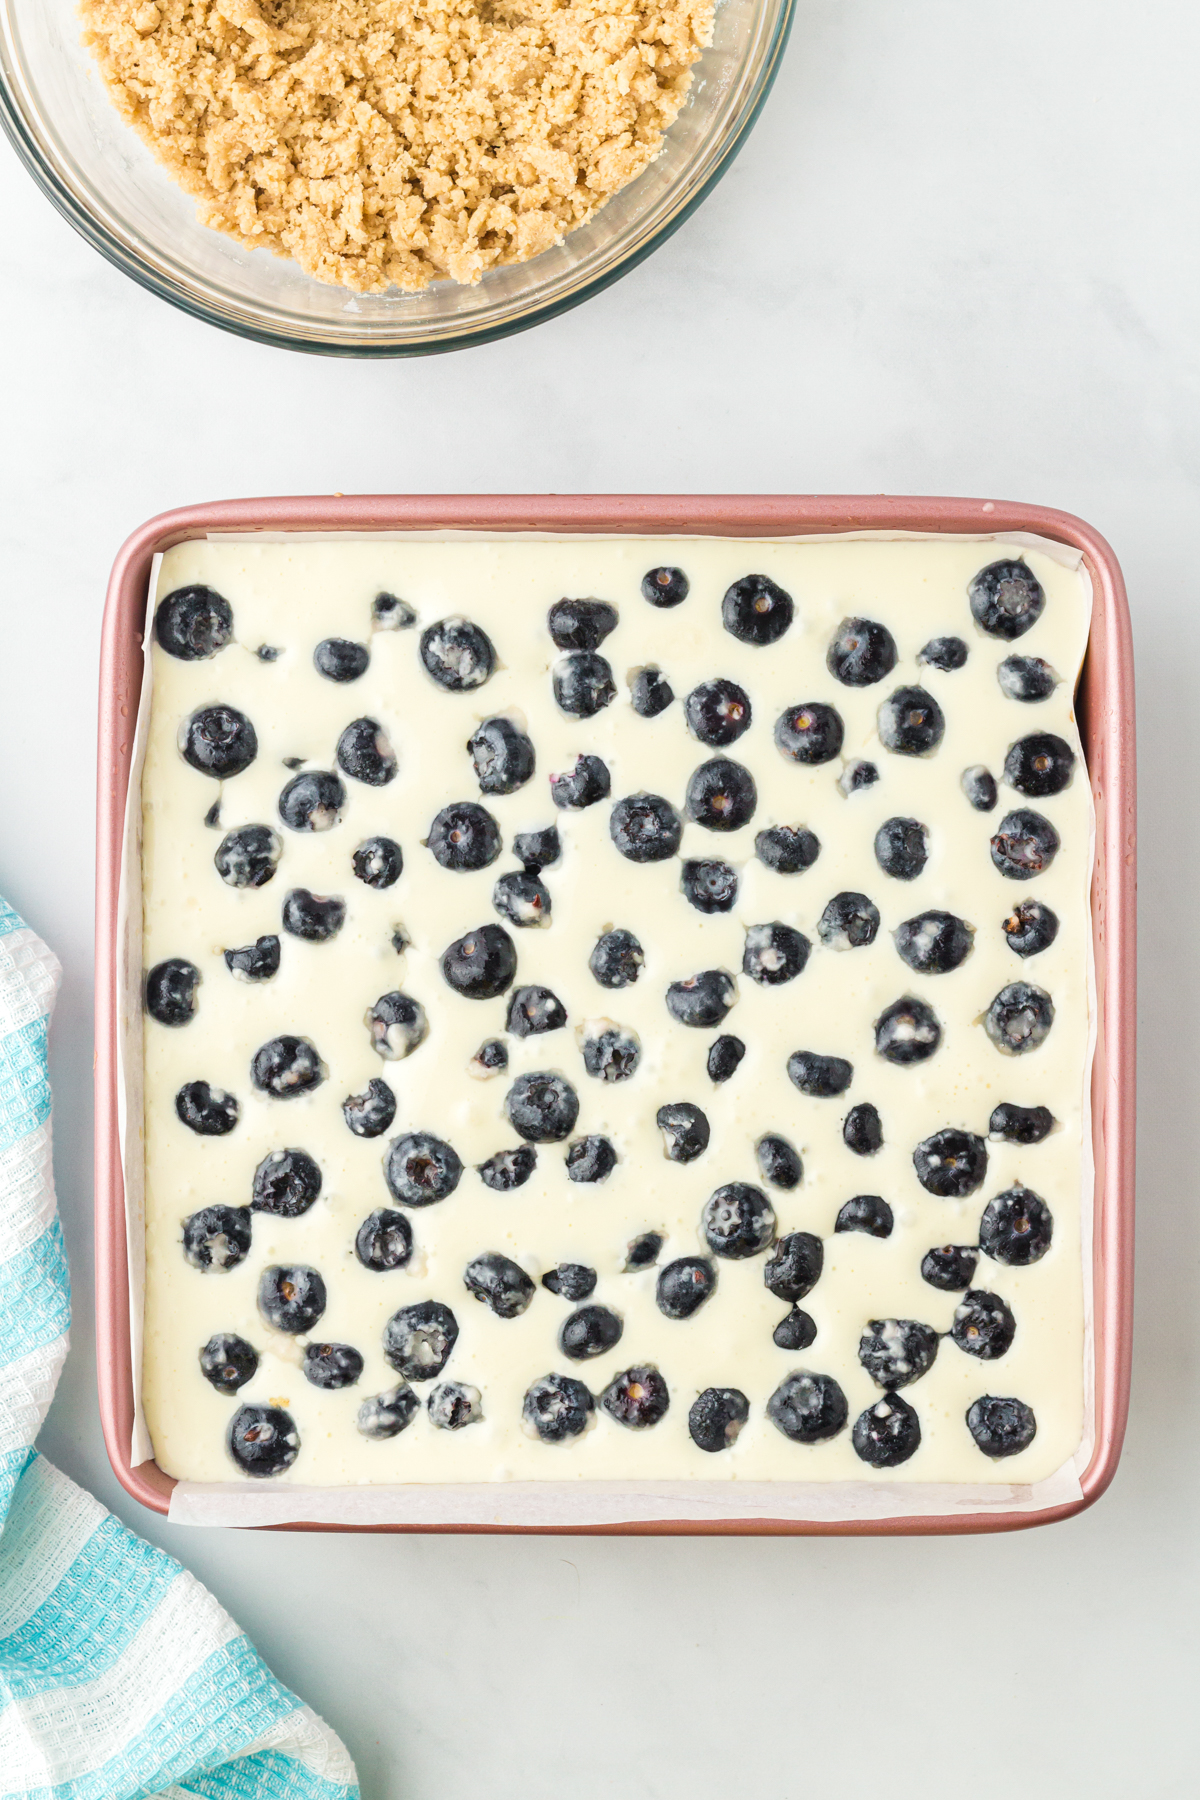
For the blueberry layer, start by mixing together the blueberries, lemon juice, sugar, and flour together in a small bowl. Stir them with a silicone spatula or wooden spoon gently to coat the blueberries but not smash them. Once it all mixed together, sprinkle the coated blueberries evenly over the cheesecake layer. They may fall down slightly, but that’s okay!
4 – make the Crumble Topping
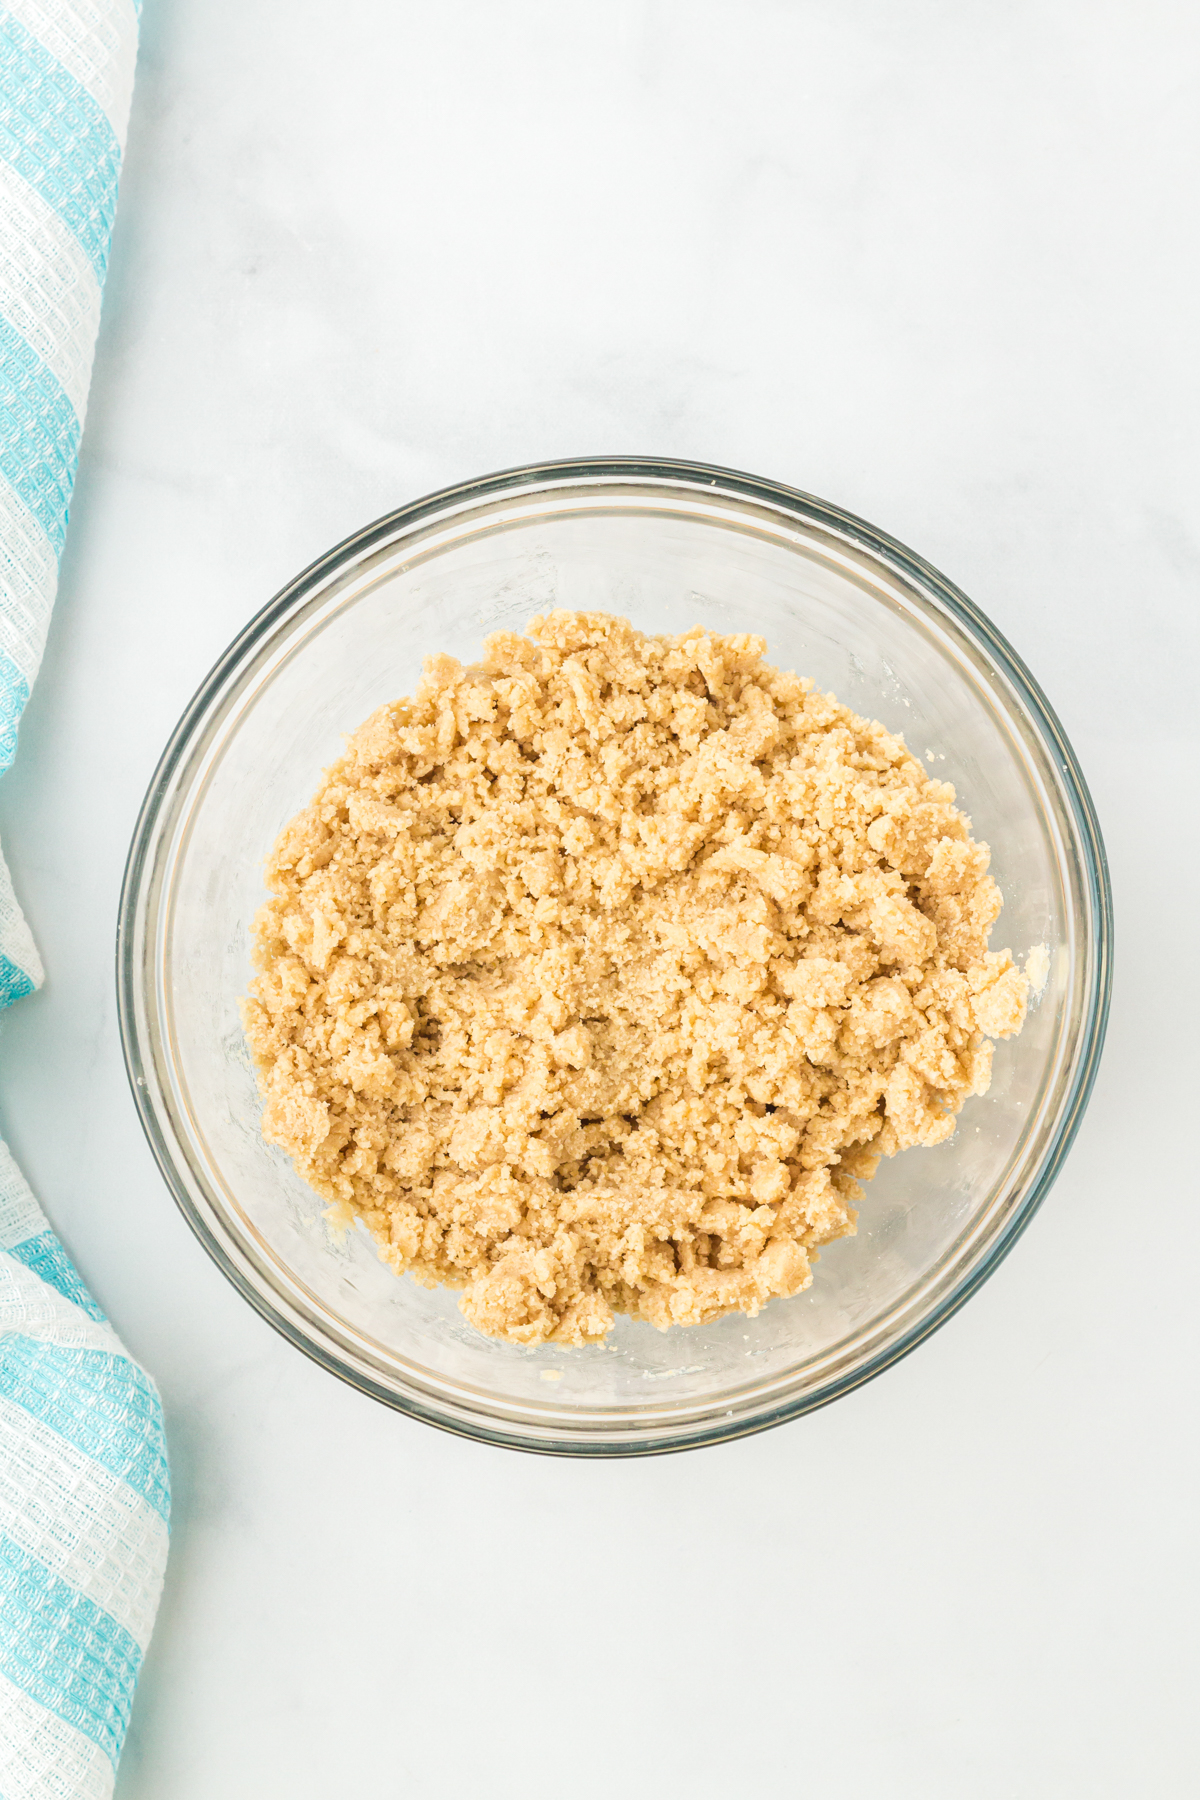
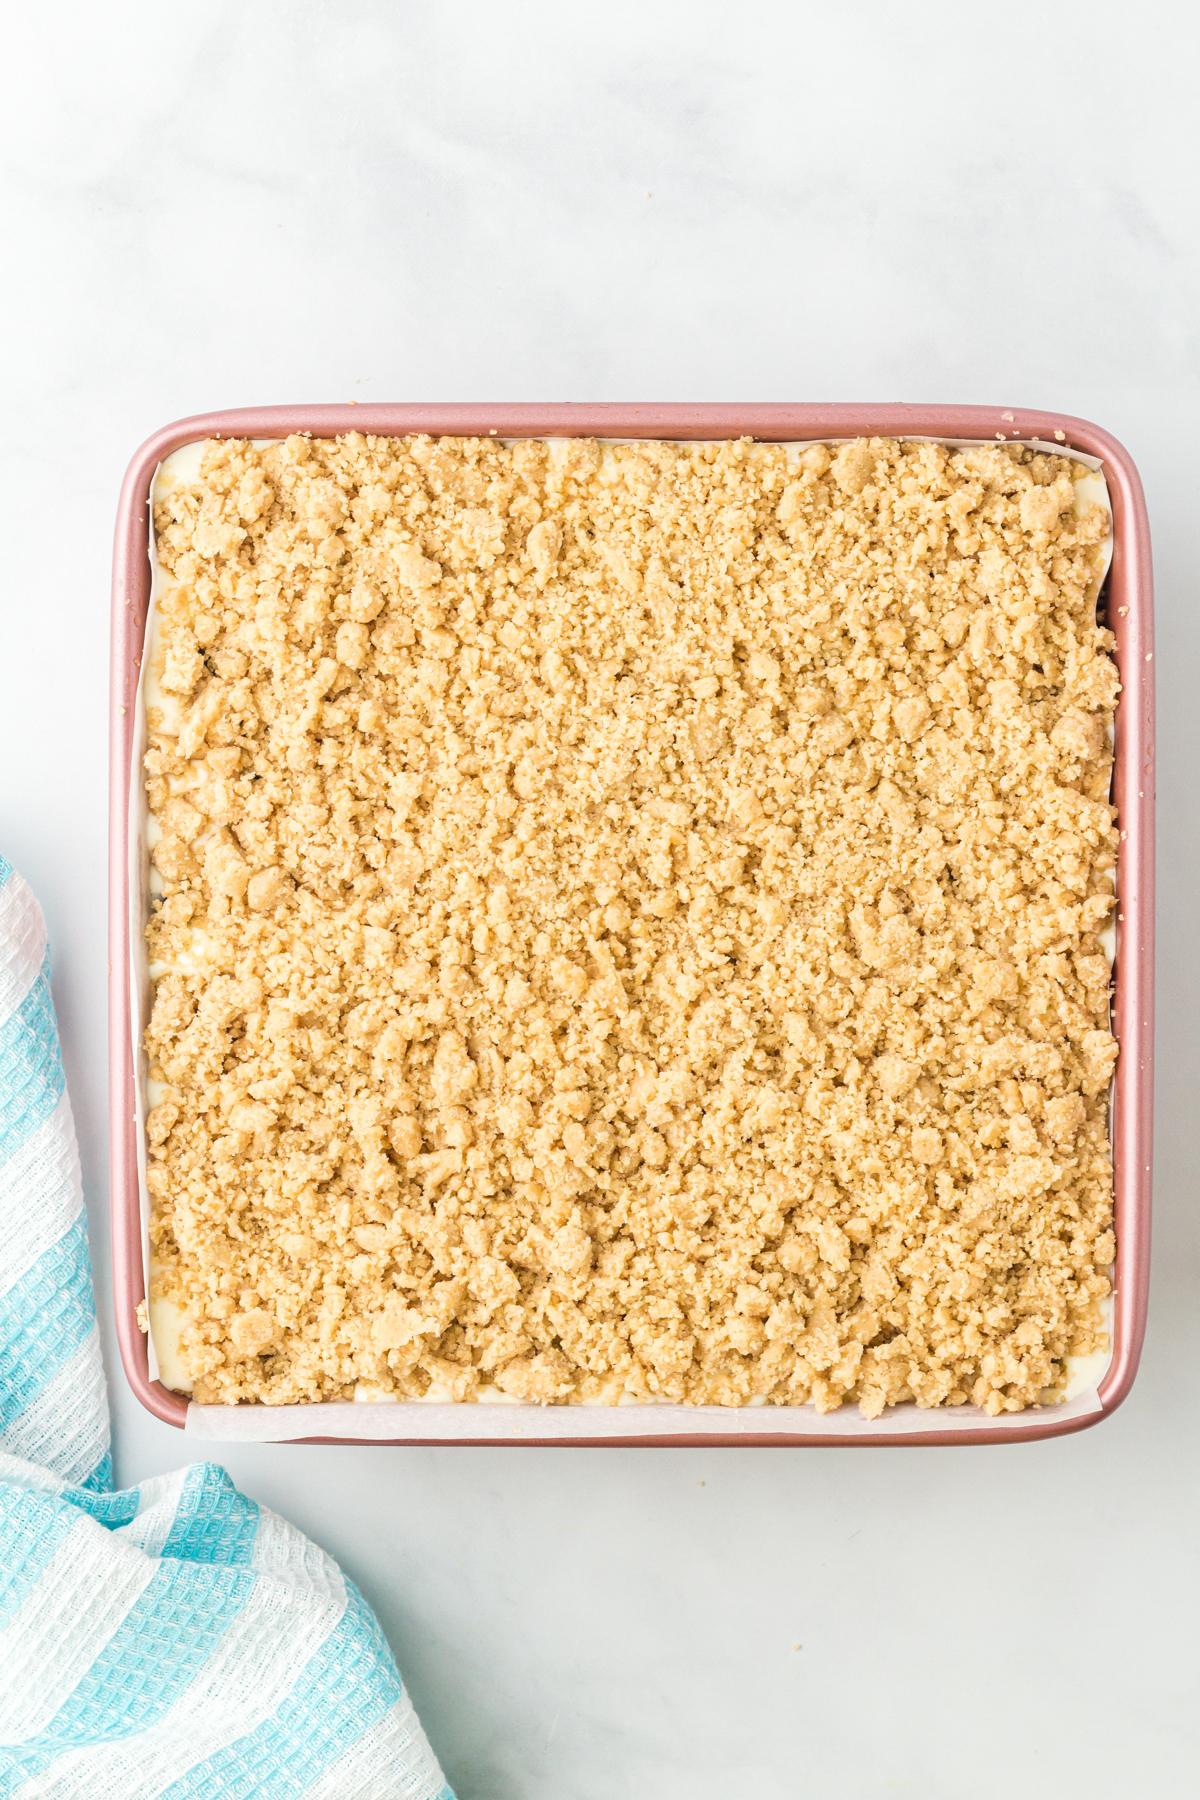
For the final crumble layer, beat together the brown sugar, flour, and butter until it forms a crumble mixture. You can either do this again with an electric mixer or it also works well in a food processor. If you can’t get it to crumble all the way, you can also use your fingers to combine them together until you get fine crumbs. Sprinkle the crumble mixture on top of the blueberry layer, covering the entirety of the cheesecake filling.
5 – Bake the Cheesecake Squares
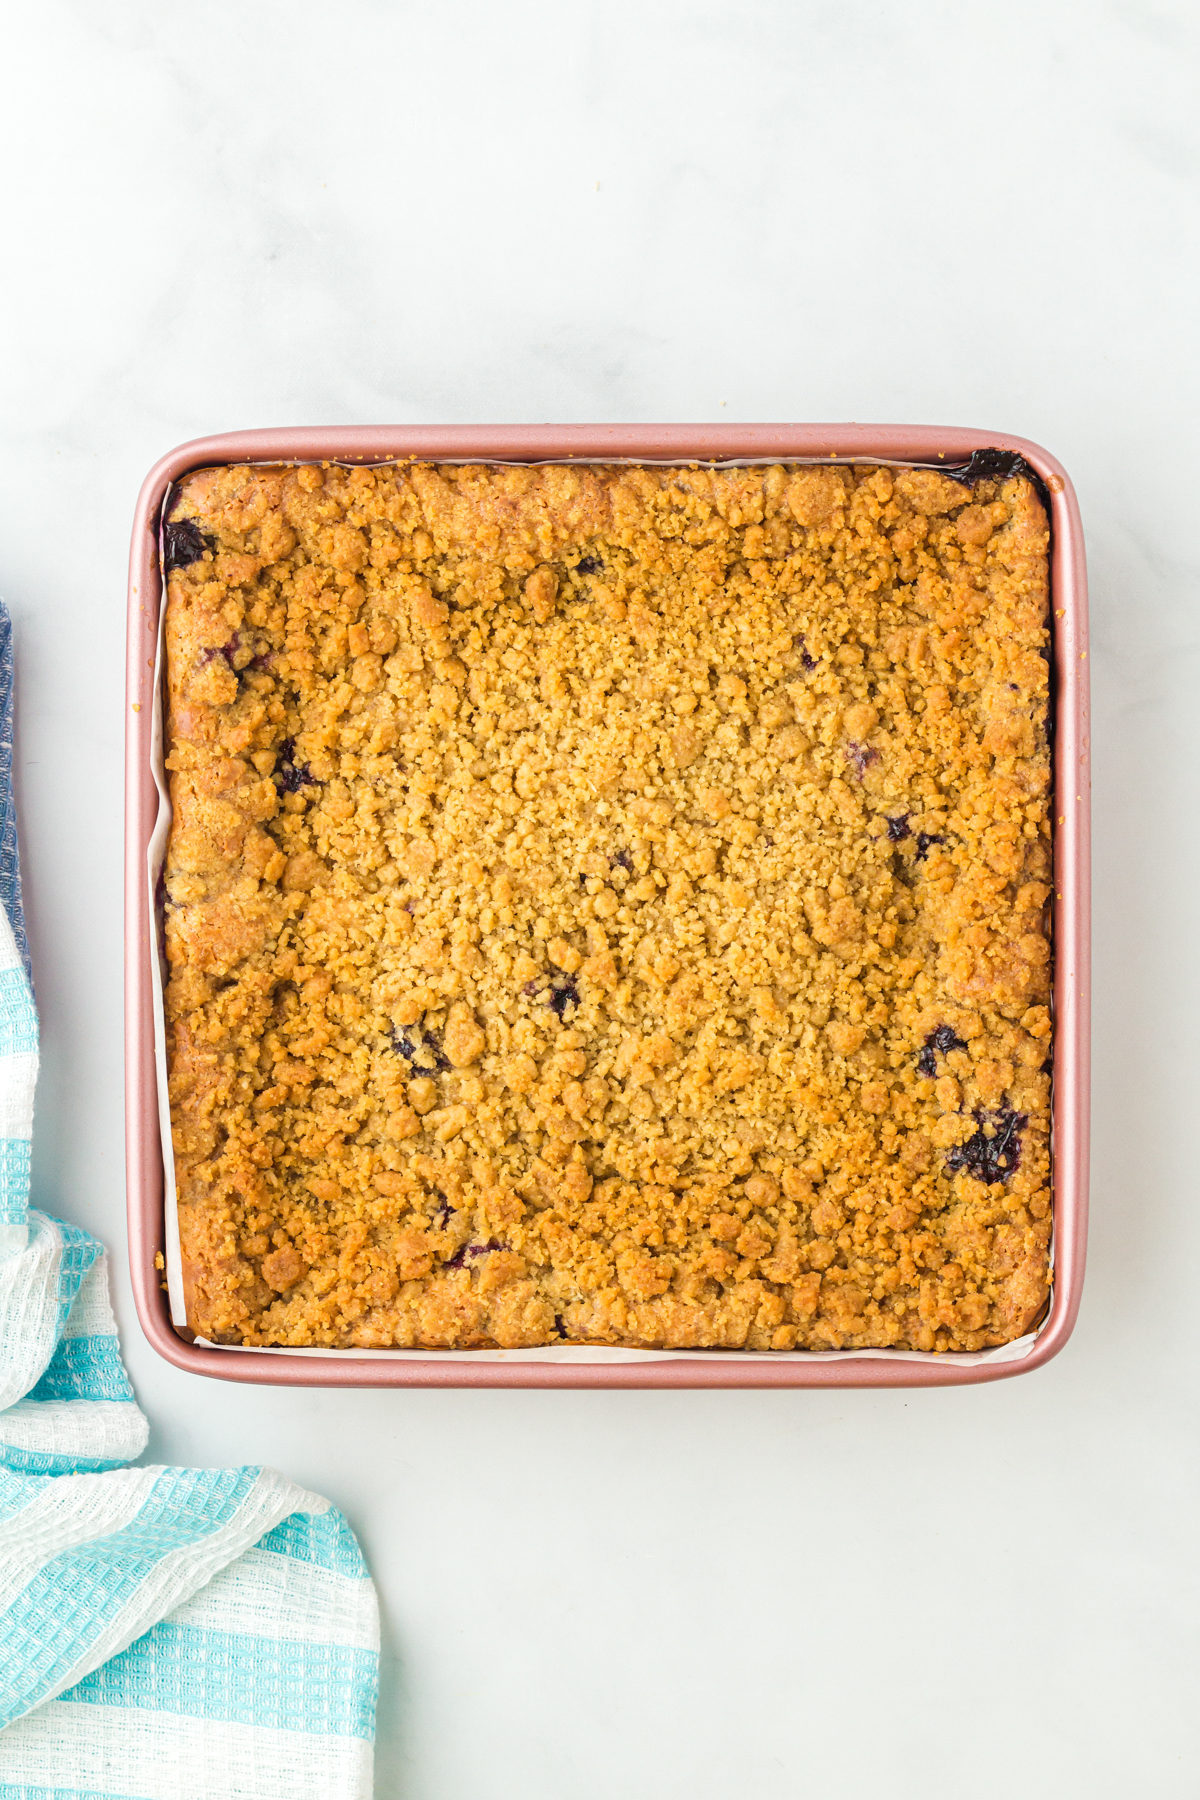
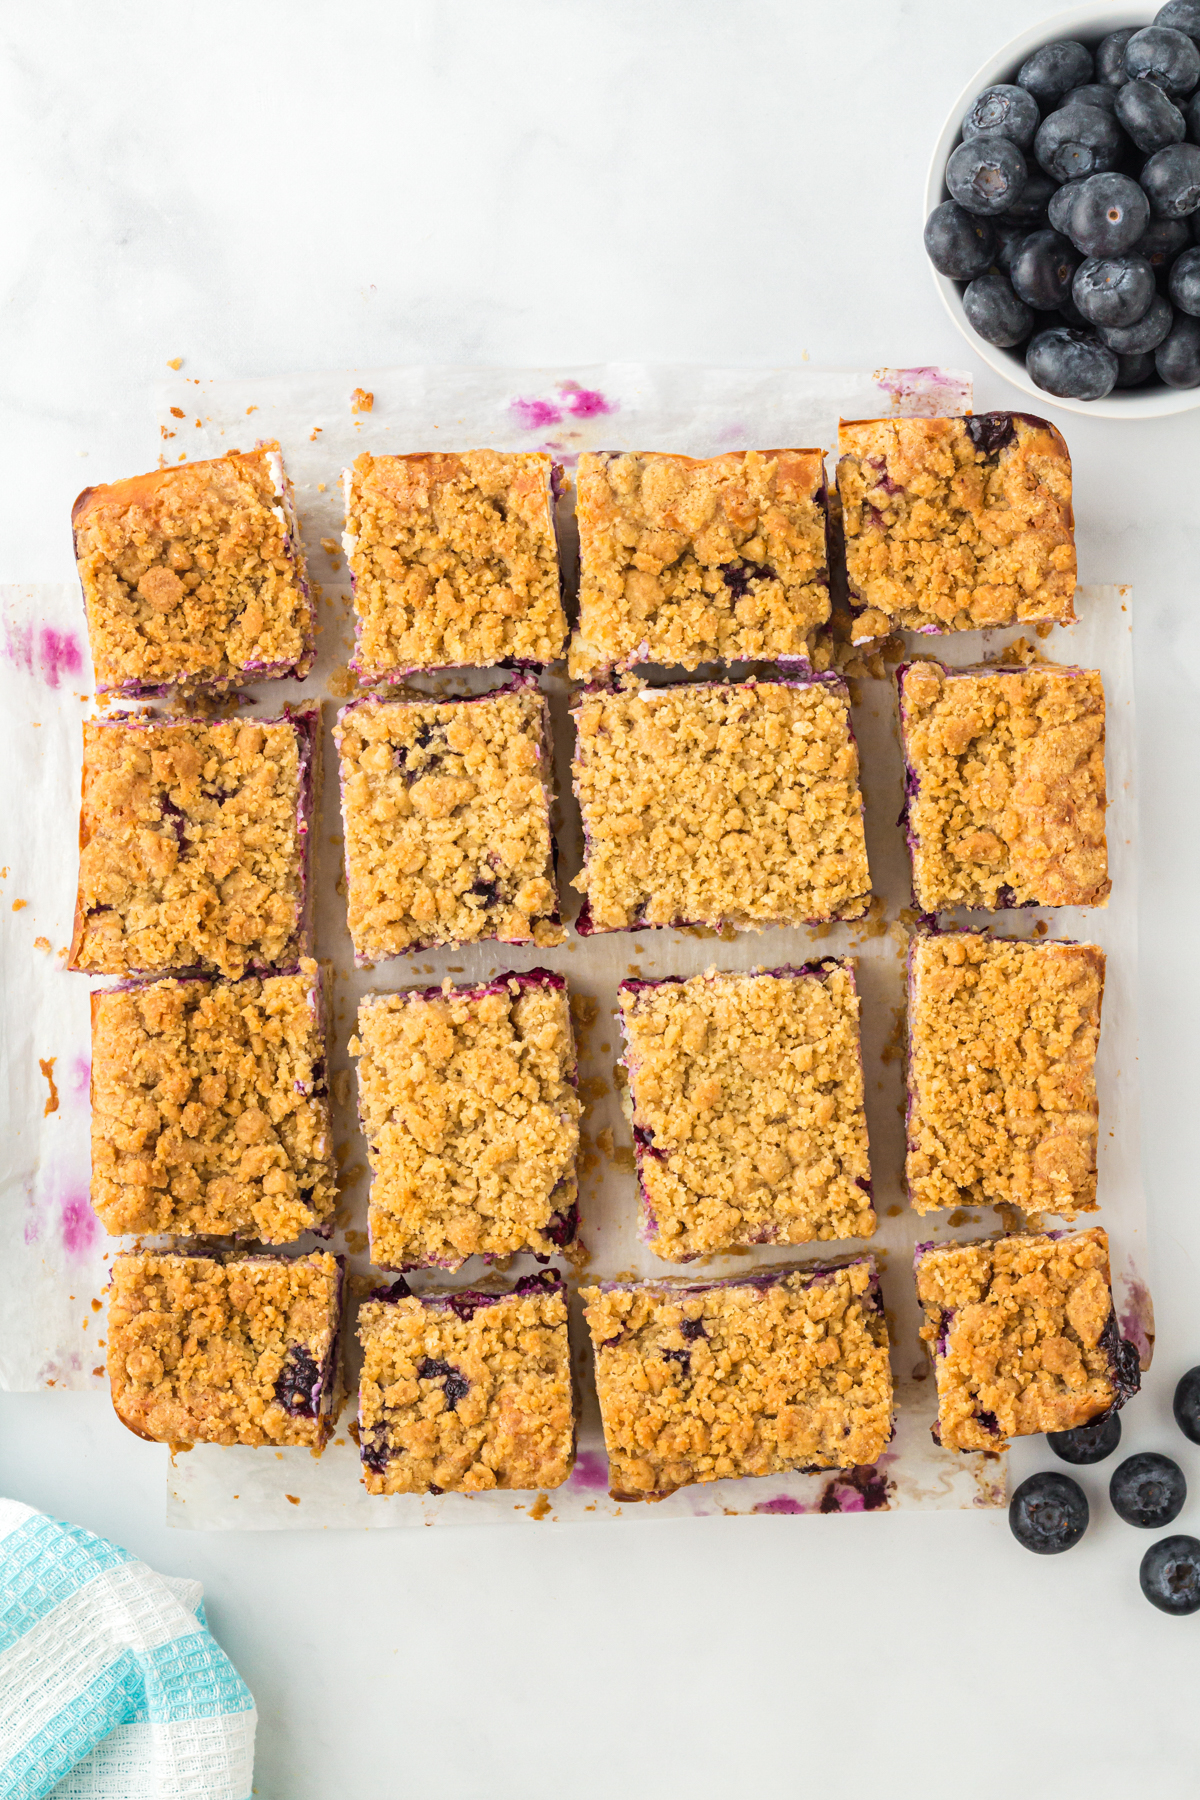
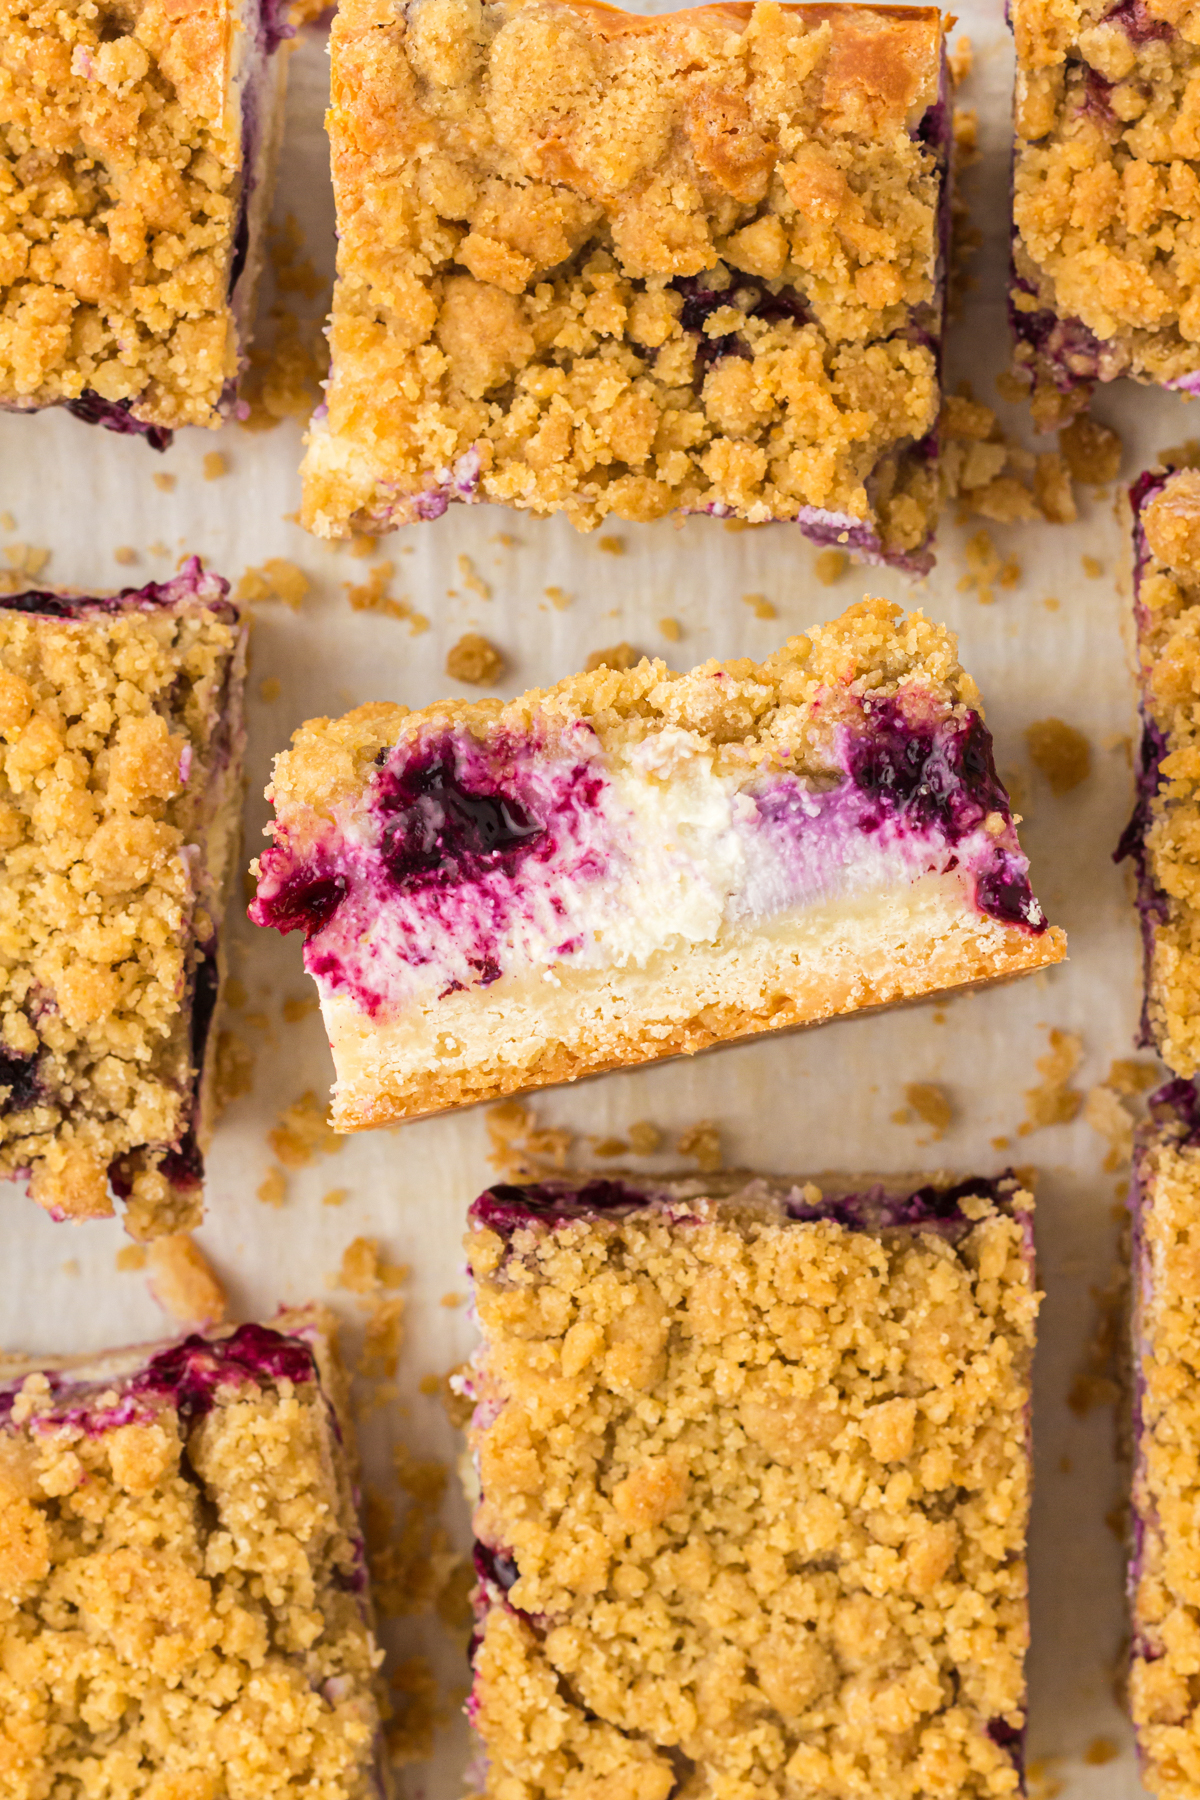
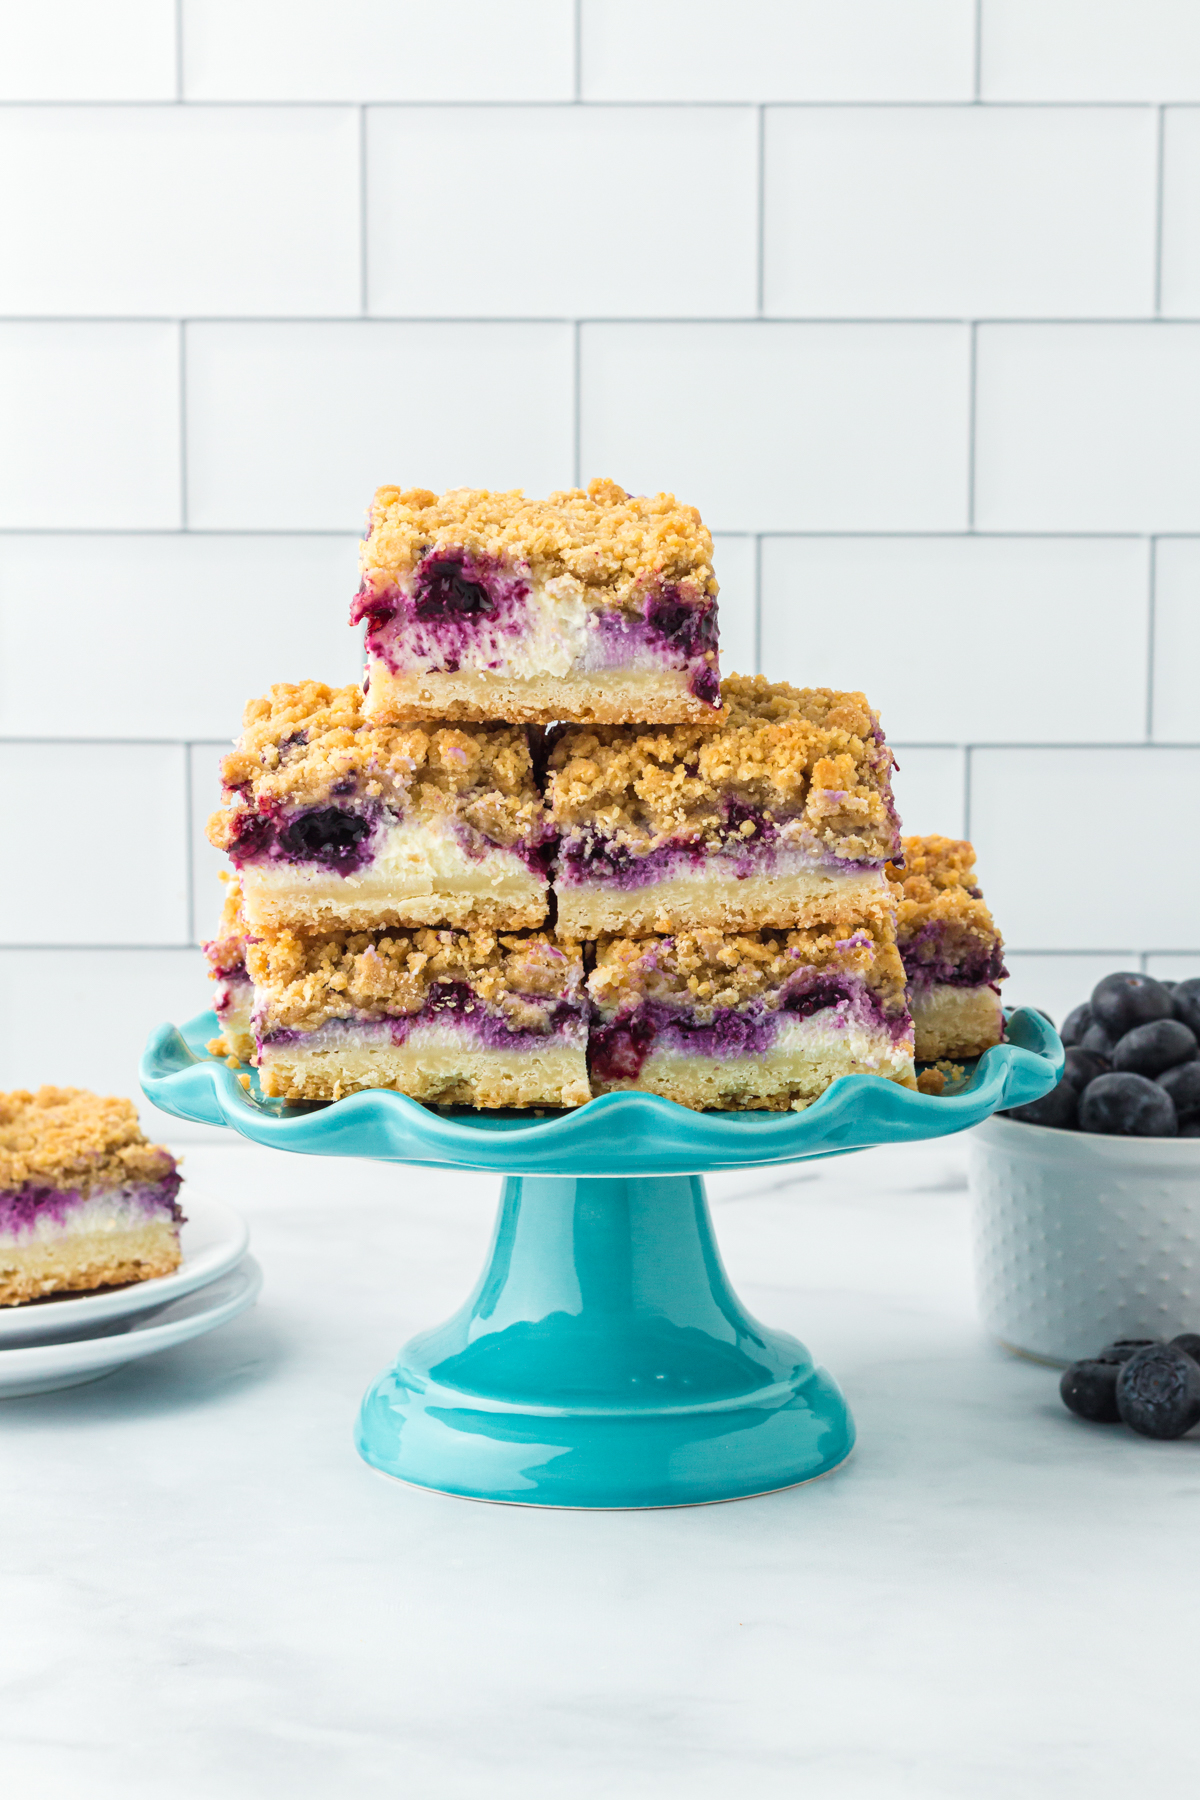
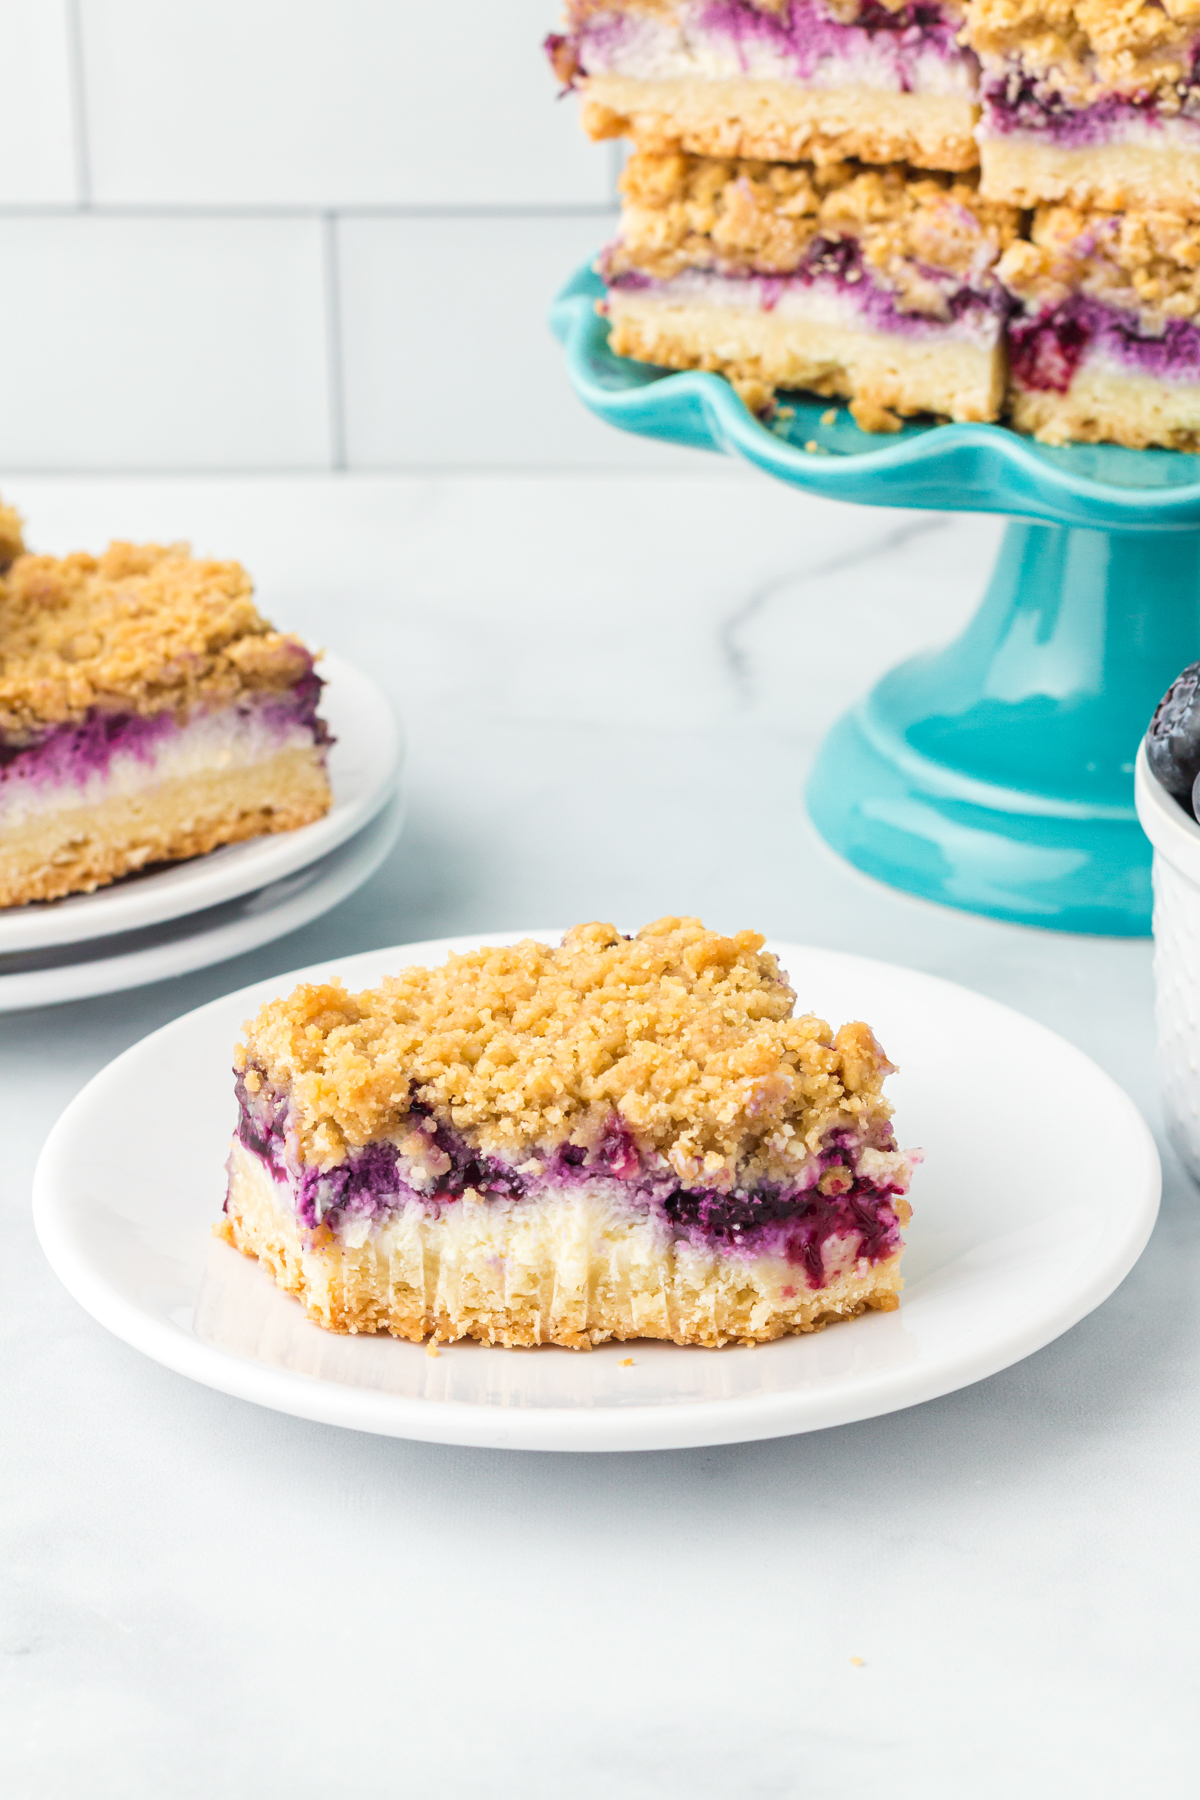
Bake for 55 – 60 minutes at 325 degrees. Check to see if the filling is set by gently shaking the pan to see if the center is set or if the cheesecake filling is still jiggly – you want it to be set. You’ll also know they are done when the center of the dessert squares isn’t caved in. When the cheesecake is cooked, that center will pop back up so the entire top of the dessert is more even. If it’s still not done after 60 minutes, add another 5-10 minutes on the timer and let it keep cooking until you get that more set quality to the cheesecake before removing from the oven. Let it cool at room temperature for an hour, then cover in plastic wrap and cool in the refrigerator for at least seven hours or ideally overnight. Use the parchment paper to pull the bars out of the pan cleanly (this is my favorite reason to use parchment paper). Then cut into 16 bars using a sharp knife for clean edges. Serve immediately while still chilled or if not serving yet, put back in an airtight container and chill until serving. Just look at those thick layers of pure heaven! And don’t be deceived, this sweet treat may be cut into little pieces, but they sure pack a punch. They’re rich, creamy, and delicious so you probably won’t need more than one at a time. I also love these because they actually stack really well because of that crumble topping. So unlike cheesecake that just sits flat, these cheesecake bars can be stacked all pretty on a cake stand because that’s definitely important!
Expert Tips & Storage Notes
Stir the blueberries with the coating ingredients gently. You don’t want to totally burst the blueberries or they’ll change the color of the batter from white to blue. My pro tip is to use a silicone spatula and stir slow and smooth. Sprinkle a few blueberries into the cream cheese mixture at a time rather than just dumping the entire bowl onto the cream cheese filling. They’re hard to move once they’re in the filling, and you want the blueberries to be spread out throughout the bars so every bar has some blueberry topping. Line the baking pan with parchment paper for an easy way to get the bars out without making a mess! It’s also a great way to be able to get even cuts on your bars for serving!
More Easy Berry Desserts
These are some of our favorite berry desserts that would be a perfect addition to these bars! Or a great option for you to try next if you just want some delicious recipes!
Cheesecake fluff – this smooth and creamy dessert salad combines cheesecake filling with fresh berries and is so good! Strawberry cheesecake bars – similar to these blueberry lemon cheesecake bars, these strawberry ones have strawberries, cheesecake, and a crumb topping!Fruit pizza brownie – a different take on a fruit pizza, this one with a brownie bottom! It’s even better than a traditional fruit pizza!Strawberry soup – this may not be a traditional dessert but when you combine it with fresh berries and whipped cream, it’s a great refreshing dessert soup! Kool aid cake – a delicious strawberry poke cake made with strawberry flavor! I’ve been making one for a long time!